by Don Alexander
“Why do I need such a powerful winch when my Jeep only weighs 5000 pounds?” A common question asked during our Jeep 4×4 School winching clinics. A winch pull on flat, hard surfaces with tires inflated to highway pressures takes a couple of hundred pounds of force to move. Different situations like slope grade, rock faces, and surface condition affect the rig’s pulling load. Naturally, the weight of a fully-loaded rig is the most obvious, and having a good idea of your rig’s laden weight is essential. For example, a modified Wrangler JK Unlimited will weigh in the 5500 to 6000-pound range. Some overland vehicles can weigh even more. Older CJs, Wrangler Yjs, and stripped pickup trucks may weigh only 3500 pounds. The amount of gear carried is also a factor.
 The surface condition alters the resistance, as well. Smooth asphalt or concrete offer little resistance and, therefore, little pulling load. The resistance is only about 2-3% of the rig’s weight. Not much load, to be sure. But if you add soft surfaces, the rolling resistance goes up, as high as 50% of the rig’s weight. Add in muck, snow, or mud, and the stuck factor and resistance increases exponentially. The pull needed to free rigs stuck up to the axles or frame may be as high as 120% of the rig’s weight.
For most soft surfaces, sand, snow, mud, gravel, and soft dirt, figure the load will be 25 to 30% of the rig’s weight. The load grows when the surface is softer, deeper, or gooey. And that’s on level ground. Winching up a slope adds even more load to the pull.
Intuitively, you know the steeper the slope angle, the more the load will increase. At 30°, it is about 60% of the rig’s total weight, but at 45°, the load is 100% of the rig’s weight. If you try to winch up a 60+ degree slope, well – don’t! Take an alternate route. And remember! You need to add the rolling resistance factor to the equation along with the slope. It’s a tough pull up a 60° slope with soft surface conditions. And finally, most 4×4 electric winches are rated for an intermittent duty cycle, so if you have a long, hard pull, give your winch and battery a break once in a while. Let the motor and battery cool for a few minutes, then resume the winching process.
ANCHOR POINTS FOR WINCHING
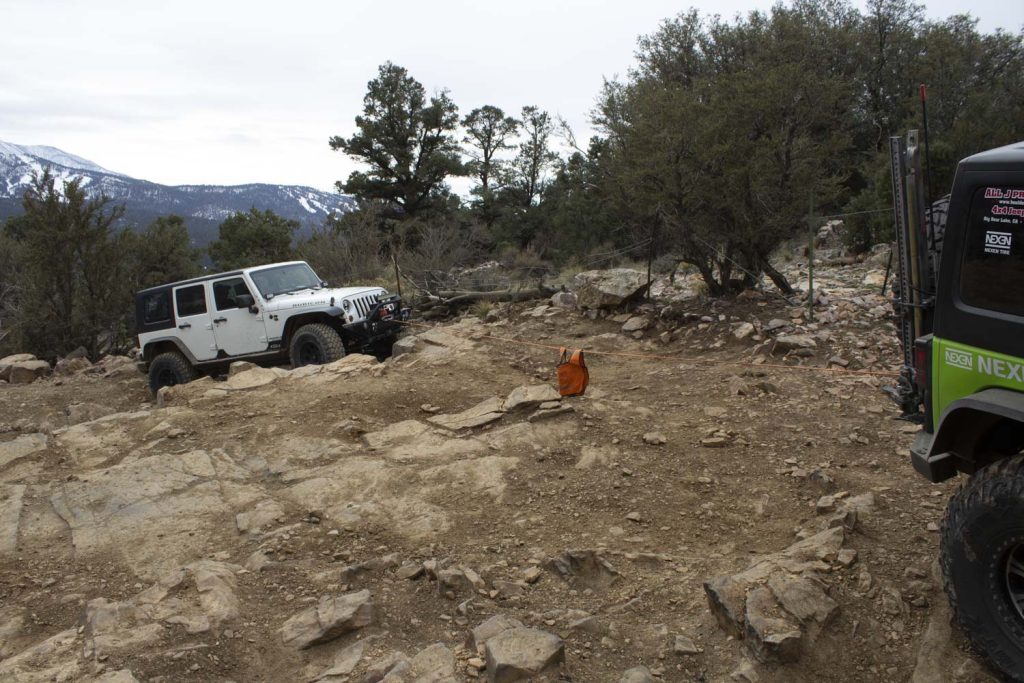
 Winches are designed to pull in a straight line perpendicular to the centerline of the winch spool drum. Any variation from a straight pull places a greater load on the winch, the winch line, and other components and increases the risk. If the winch line is being “bent” to either side by the fairlead, the winch line’s angle is too great. This puts a sideways load on the winching vehicle. Lateral loads will pull the rig sideways. Realign either the winching rig or the anchor point to get a straight pull. Ideally, the winch line should clear the side of the fairlead by at least an inch.
Angles too large can cause all sorts of problems beyond accelerated wear and tear on the winch, fairleads, and winch lines. The side load creates an additional drag component. Think of trying to pull a rig from the side and the furrows the tires would try to dig. Any angle off from straight adds a sideways pull and increases resistance. And that sideways load puts a strain on the suspension, tires, wheels, and wheel bearings. We have seen tires begin to unseat from the wheel beads with a nominal side load while winching up a steep incline. On a wide-open area, either sloped or flat, you may need to steer the rig being winched in the first few feet of pulling so that everything aligns properly. But be careful if you are on a steep slope. If the steering will cause the winched rig to traverse the slope at even a slight angle, a rollover becomes more possible. It is wiser to find an anchor point that better aligns with the winching process. The winch will try to align everything naturally anyway, but the real issues occur on narrow trails where you have no room to maneuver.
Most winching operations require very little winching distance to get the stuck vehicle off a high centered position or through mud, sand, or snow. Sometimes you may want to select an anchor point that will allow playing out most but not all of the winch line. Remember that a winch makes the most power with the fewest layers of winch line on the drum. As layers are added, the drum diameter increases, which changes the gear ratio of the winch and reduces effective pulling torque. The more load you think the winch will be pulling, the more critical it is to start with the fewest layers of winch line on the winch drum. If need be, use a snatch or pulley block to allow more winchline to be unspooled from the winch drum. The key is always to survey the situation before you begin. You have time on your side. Haste in the beginning almost always costs way more time than patience.
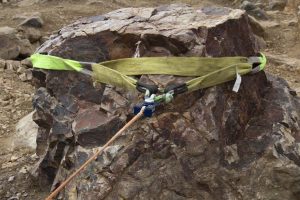
If having to use a tree as an anchor point, use a wide tree saver strap. Straps can be used around trees or rocks. Make sure that the tree or rock is substantial. Small trees can become uprooted, and rocks can become dislodged. You want to move the rig, not the anchor.
The tree saver strap should be placed around the bottom of a tree trunk as close to the ground as possible; this is strongest point of the tree. There are exceptions to this. If placing the tree saver forces the winch line to angle down from the winch, the winch’s pull will begin to compress the front suspension. This will increase the load on the winch and make the pull more difficult. If the tree is over the brow of a slope, placing the strap higher will keep the winch line off the ground. But watch the tree closely as the load increases; if the trunk begins to bend much, you may need to move the strap lower on the trunk. Use a towel or piece of carpet under the winch line where it rubs on the ground to protect the line. On a rock, attempt to place the strap so that the strap is below the waistline of the rock so that if the strap does slip under load, it will slide down towards the ground, not up and off the rock. Next, place the looped ends together and align the ends with the winch direction of pull. Finally, insert the loops onto the bowed section of a bow shackle, then insert the pin through the winch line end link. Remember to tighten the pin until it bottoms, then back off ¼ turn to assure that unscrewing the pin is easy when removing it. 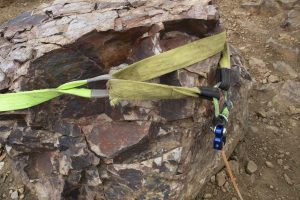
ANCHOR TO ANOTHER RIG
While other rigs do make good anchor points, they should not be your first choice. Since another rig may also be traction-limited, it could easily slide towards the rig being winched, even when in gear or park, and with the brakes applied. This applies to a stationary rig attempting to winch out another vehicle. If a fixed rig is used, the driver should be in place, holding the brakes with the rig in neutral and the engine running. Place wheel chocks to help keep the rig stationary. If the rig intended to remain stationary does not, cease winching immediately and try something different.
USING A PULL PAL GROUND ANCHOR
The Pull Pal is a great tool. If you have nothing to pull against with a winch, the winch is useless. The Pull Pal provides an anchor point when no trees, large rocks, or other rigs are available. The one thing that is always available is ground. We have used the Pull Pal in snow, ice, sand, dirt, loose dirt from mine tailings, gravel, and loose, small rocks. It has always dug in enough to easily pull from, and it is easy to use, though somewhat bulky, by necessity.
The Pull Pal gets your rig unstuck by inserting the plow point into the soil. As the winch cable tightens, the point embeds itself deeply and firmly into the ground and frees your rig with the assistance of the winch and the wheels in motion. The more force applied to the Pull- Pal, the deeper it embeds, providing increasing anchoring security. By tensioning the winch line, the geometry of the plow head and arm pulls it into the surface at an angle. More force on the winch secures the plow head more firmly in the ground. The plow movement slows, and the winched rig begins to move forward. The head will take set, and you now have a very secure winching anchoring point. To release the Pull Pal, remove the winch line and lift up on the arm assembly until it breaks free of the surface.
The loads on a winching anchor point can be huge and dangerous. Shackles, straps, and attachment points on a rig need to be substantial, stronger by a significant amount than the pulling power of the winch itself. Attachment points on a rig need to be as strong as the rig itself. Points should be either part of the chassis or very securely mounted to the chassis. Bumpers designed for off-road vehicles, like winch bumpers and rear bumpers that provide additional protection, usually have mounting points for shackles. Since these bumpers attach to the frame very securely, they are the ideal location for recovery points, places to attach shackles, or winch line hooks. Never use a strap around a solid axle housing. While the housing is not likely to be damaged, pulling on the suspension control arms can cause the pivots to become damaged, possibly failing. Attaching a strap, chain, or shackle to any component like springs or shocks is undesirable, since some components will likely fail, causing even more trouble. Be very careful where you attach any anchor point for winching.
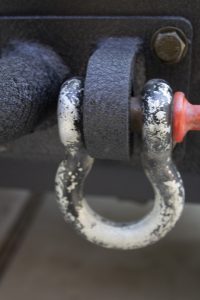
The most common “D”-ring shackle size for 4×4 rigs is a ¾” with a 7/8″ screw pin. The shackle should have a working load limit of 9,500 to 10,000 pounds with an ultimate breaking strength of at least 50,000 pounds. Many imported shackles do not meet the minimum breaking strength requirement for winching heavy loads. Quality shackles are an investment in reliability and safety, both important factors when working in the backcountry.
SOFT SHACKLES
With advancements in synthetic rope technology, soft shackles have become very popular for use in vehicle recovery situations. Soft shackles are lighter, easier to use, and offer more attachment options than steel shackles. Soft shackles improve safety in the same way synthetic winchline is safer than steel winch cable.
END LINKS & HOOKS, CLOSED LOOP WINCHING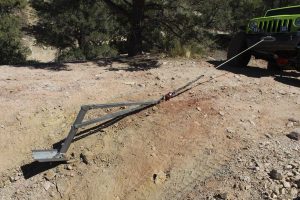
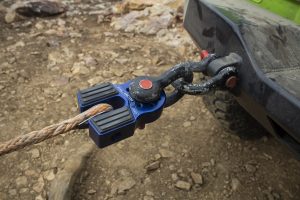
Winchline hooks with spring-loaded retention flaps have been the standard for end links for decades. Hooks create an open-loop winching system. The hook can become disengaged when momentary slack occurs during winching. With heavy loads, the hook is more prone to failure than a closed-loop system. A closed-loop system allows the shackle to be captured in the end link with no chance of the shackle being dislodged or falling away. The shackle screw pin (or in some cases, the bow end of the shackle) is attached through a hole in the end link, firmly capturing the shackle in a closed system. The closed-loop system is much stronger and safer than the open-loop system using a hook.
Keep in mind the enormous loads 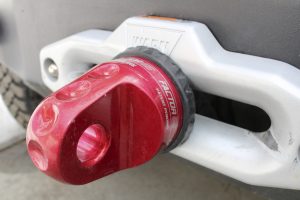 that may exist when winching. If any component or anchor point fails, winch lines, especially wire rope lines, shackles, pulley blocks, and brackets, can become projectiles with potentially lethal forces. People have been killed from failures in these components. Take your time to plan the operation, respect the enormous forces at play, and use common sense for a safe and effective winching operation.

