Man Cave Conversations
Man Cave: Vintage Camper Refurbishment
 Story and Photos by Tonya Mercer
“Hey,” I said to my husband, Chris, over the phone, nervous with excitement. “I need $800.”
“For what?!” he asked.
“Uh… well, I think I just bought a camper.”
We had been looking for a small, lightweight camper for quite some time, but finding one that met our long list of requirements hadn’t been working out. To make matters worse, once COVID hit, anything small enough to tow with our Tacoma was selling high. For years, we pulled a pop-up camper on our adventures, but we had decided it was time to move on to something hard-sided. After perusing the market, I approached gingerly, “What do you think about getting an older camper and then fixing it up? We could probably sell the pop-up for enough money to cover the whole thing.” Chris was not impressed with the idea; reviewing Pinterest together didn’t help. Anything that looked like a 50’s diner was out, and the glamping pictures were way over the top. I finally convinced him to look at a 70’s camper in a neighboring town. While that camper had all of the amenities we were looking for, we quickly noticed that even though it had new curtains and cushions, it also had a soft spot in the floor by the door. Further investigation showed the floor was rotting along the whole backside of it. We did not want to do a complete rebuild, and so we walked away.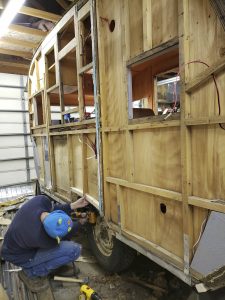
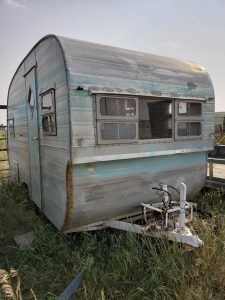
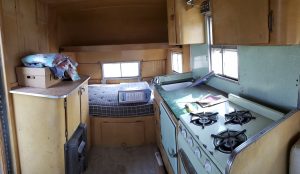
Late one night, while mindlessly scrolling, a little vintage camper made its way onto my screen. I immediately messaged the seller about it. By the time we managed to get there, someone else had already looked at it as a playhouse for her grandkids; she was headed home to measure her backyard. We looked it over anyway; the mint green appliances were intact, as was the table. It was all there, including the trim. It seemed structurally sound. The metal had separated on the front corners and along the bottom at the back. There were obvious signs that it had water leaking at some point, but the seller told us it had stayed dry all winter. The counter had been replaced, the curtains had come apart in the wash, one of the cabinets had been sawn off in the middle, and the doors suffered from a miserable hack job. It listed to one side where a leaf spring had broken, the jack needed replacing, the propane bracket was mangled. It didn’t have a bathroom. It was small, really small. It was perfect, but I was afraid to love it, for fear that it was already sold. On my drive home, I received the phone call; the camper was ours if we wanted it.
We hauled it home on the back roads and parked it in the driveway for a few weeks. We weren’t even sure where to start with it. One day, when I wasn’t looking, my husband put it in the garage. He said he was going to fix the broken leaf spring so we could move it easier. When I looked next, the siding and front window were pulled off.
“What did you do? Do you know how to fix that?” I exclaimed with concern. “Why is the camper in a hundred pieces?”
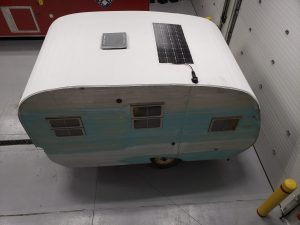
 Upon closer inspection, some wood was going to need replacing, along with the original 110 wiring. There were three sets of trailer wiring under it, none of which worked, and spare propane lines ran to an old furnace that someone had added. We decided to rewire the entire trailer, and while we were in the walls doing that, we decided to add a 12-volt system and solar. In the process of repairing and rewiring, more and more sheet metal came off. All of the windows came out, the kitchen cupboards were removed, and we discovered that the backsplash laminate had water damage. That meant more tear down. The more time I spent in the garage during tear down, the more I annoyed my husband with voiced concerns about all of the pieces. I was banished from the garage while he did the things he needed to do.
With newfound time on my hands, I started working on sourcing components and obtaining a title. With no suitable replacement for the backsplash, we decided to use beadboard. Every trip to the hardware store resulted in more paint chips brought home to find just the right color of green to go with the appliances. I contacted a friend who did woodwork in his spare time to see what he could do about our mangled cabinet, the missing cutting board, and a couple of other issues that were out of my comfort zone. We made a plan to keep what was left of the original cabinet, create new doors and a countertop for it, and then create a smaller cupboard to install above it. I started researching how to refinish the wood already in it and how to stain it to match the new wood. We also had to find new countertops because the two counters and tabletop did not have matching surfaces. We got a quote and samples of poured epoxy counters, but they didn’t feel right in the camper, and neither did the retro boomerang style samples that came in. Reproduction “cracked ice” was available and pricey. It also didn’t come in the colors we wanted. I kept ordering samples online, hoping to find a suitable option. When the next batch arrived, a couple were promising, and a couple I nearly ruled out. As we placed them in the camper, we noticed that a couple we had nearly ruled out were really good fits, and the stuff we had liked really weren’t. The camper seemed to be telling us what it wanted.
 We ordered some retro floor tiles, and then the day after they came in, so did some other samples that I had been waiting on. One of the new linoleum samples nearly matched the original flooring perfectly. However, the linoleum I picked was problematic. It was almost seven times the price of what I had bought; it was a commercial product that came in three-hundred-foot rolls; our friend that installed linoleum said that I really couldn’t have picked a more difficult product to install in such a small space. I called six places before I found one that would order a piece the size I needed.
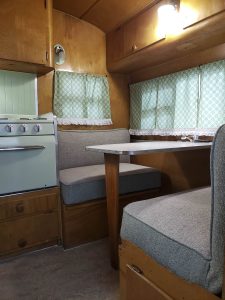 The upholstery was in pretty good shape for its age, but there were a couple of seams starting to pop. I had done some small upholstery projects in the past. After some consideration, I decided that I would rather have a professional re-cover the dinette seats. An upholstery business nearby gave me a reasonable quote, and I started ordering more samples. We decided on a pair of colors; I took the seats over to the business and stopped to check the mail on the way home. More fabric samples had come in, and there was a new pair of colors that I liked better. I casually laid them inside the camper. They felt like a couch from my Grammy’s. We called the upholstery shop and asked if it was too late to change the fabric. Early on, I had picked out a mid-century modern fabric that I had wanted to use for the curtains, so far, with the counters and the upholstery that the camper had picked out, that wasn’t
  going to work. More samples were ordered.
Meanwhile, in the garage, all of the damaged wood had been repaired or replaced. Trailer wiring had been installed, as well as the solar, 110, and 12-volt systems with some added USB ports. The propane system had been gone through; replaced the water tank and system and added a small electric pump. Despite not wanting to take the roof off, a board needed to be replaced in the ceiling, and so the roof metal was removed too. New insulation was added to the walls, ceiling, and icebox. The beadboard backsplash was painted and installed. The axles and brakes had been gone through, and the wheel bearings had been greased. The new leaf springs had been installed, and plans were underway to build a bumper. While the 12-volt system was wired, a search was underway for a suitable battery box. Plastic boxes didn’t look right, and old coolers were too big. Finally, we found an old Milwaukee circular saw at a thrift shop that we bought just for the rounded metal box. A new propane bracket had been ordered as well as a small propane tank. Exterior lights were proving difficult as many businesses were suffering from COVID effects, so some LED lights were ordered as a backup plan.
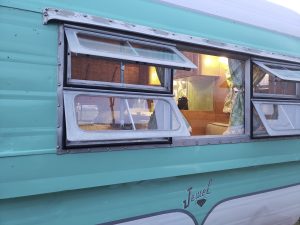
I was invited back into the garage to help reinstall the roof panel. This had to be done with care, as any pinholes created or seams damaged could cause a leak and undo our hard work. We also found that with the added insulation, the roof needed to be coaxed back into place so it would line up correctly with the vent opening and reach the front window as it had before. Once the roof was back in place, we reinstalled the exterior siding with butyl tape at all of the seams. The windows received new gasket material and were reinstalled with the trim pieces.
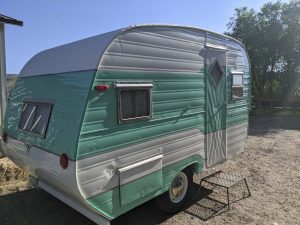
 With the sheet metal and windows reinstalled, all of the bits and pieces came back together. We painted the roof with a sealing product, and we chose an exterior paint color. The kitchen cupboards were reinstalled, and the process of restoring the wood was underway. It was finally movable again. As the jack stands were removed and it was on its wheels for the first time in months, my husband stepped into the camper, and it wiggled quite a bit. He dramatically said, “Brace yourself, Effie!”… she officially had a name.
It was time to install the flooring, but we could not keep the garage warm enough for the process, so we had to haul her to town into a warmer bay. While she was in town, we completed a VIN inspection, had the flooring installed, and then moved her over to the body shop, prepped and painted her. The new countertops were installed, the rest of the wood was refinished, and the new cabinets were stained to match and installed. The upholstery had just arrived, and you could start to see her coming together. I measured for curtains, but we had still not settled on fabric, so we brought the samples in again and held them up with the new paint, and the refinished interior. There was a floral pattern that I thought I wanted for the curtains, but once again, the camper made its choice and picked a vintage green print. The exterior lights were installed, tested, and working. The interior was nearly complete, and so we began testing all of the systems.
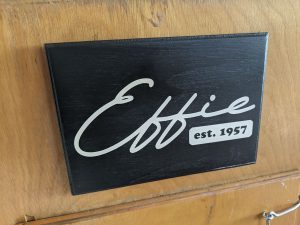
Once Effie was determined to be roadworthy and ready for camping, we needed some finishing touches.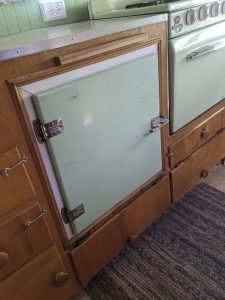 There were a couple of holes in the cabinets where we had removed the propane lights and where a bottle opener had once been installed and subsequently broken out. We placed a wooden painting over one of the holes and another one that went with it as an accent, and then with the help of a friend, we created a name plaque for Effie and covered the hole from the bottle opener. We hung the new curtains and then started to equip her with all of our camping needs. Anything that didn’t look like it was
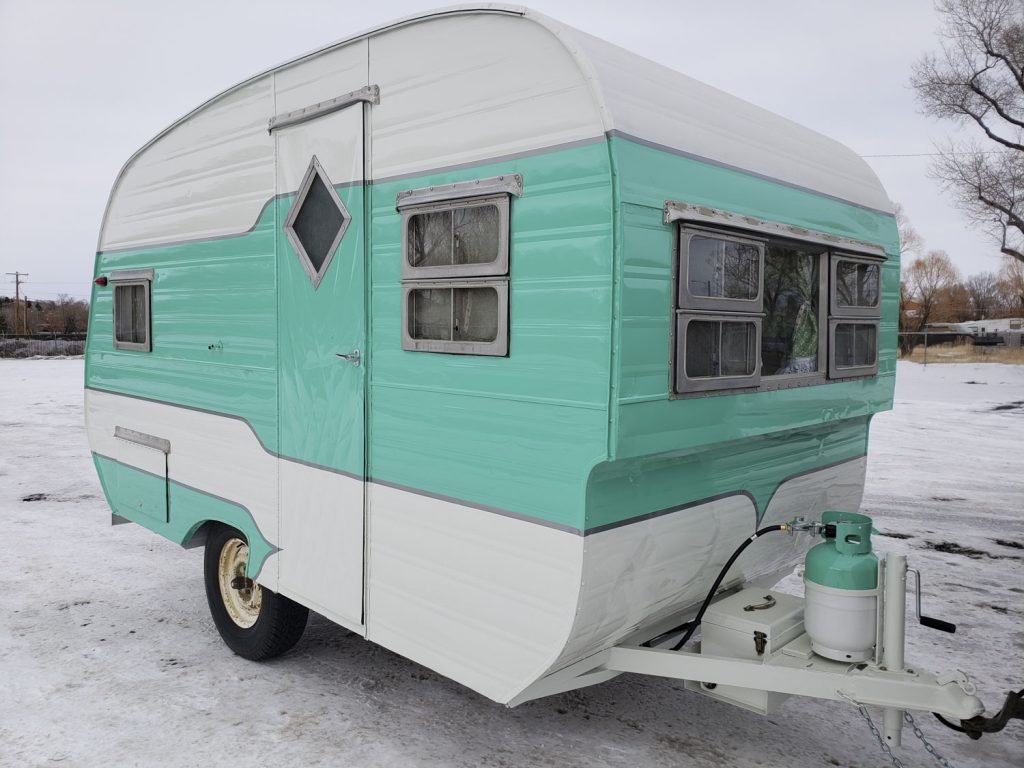
 from the 1950s felt really out of place, even awkward, in the space. We chose to stick with vintage or retro that felt vintage. The dishes are an old melamine set. The pots and pans are a 120th-anniversary retro set; the bed is complete with a chenille coverlet. I added my Grammy’s old aluminum salt and pepper shakers and an old flour tin from my mother. Effie is cozy and warm and gives you all of the good feels of visiting your grandmother’s house. She feels very inviting and receives many compliments. We never set out for her to be a complete restore; we like to think of her more as a refurbish. She still has her old dents and character but also has a renewed lease on life.
We never imagined taking on a project like this. We had some past experience from having built living quarters in our semi-trailer and were very fortunate to have an auto body shop at our disposal to do the paint work at. We were able to get help from friends with the flooring, counters, and the new cabinetry. The upholstery is the only thing that we hired someone else to do. Initially, the plan had been to keep the budget near what we thought we could sell the pop-up camper for; however, we nearly doubled that. We could have saved some money in some places, but I don’t think we would have had the same results. In the beginning, it felt a little overwhelming, as any build does. There were challenges, creative solutions, researching, mock-ups, installing, uninstalling, reinstalling, moments of frustration, and moments of excitement. Effie renewed interest in other projects that have been on the back burner, and we were able to successfully take her on a ten-day journey that spanned nearly 2,400 miles as a family. Ultimately, Effie was a rewarding project, and we look forward to all of the grand adventures that she has in store for us.

