Originally Published in Issue 34 of 4Low Magazine
Make sure to subscribe to get the newest issues of 4Low Magazine right to your mailbox. CLICK HERE
By Christian Sturtz, [email protected]
Photos by Christian Sturtz
Many vehicles are equipped with internal slave cylinders. Auto manufacturers often use internal slave cylinders because they have fewer parts. Fewer parts mean less cost and faster production, which translates into higher profits for them. If you have ever experienced hydraulic failure on a vehicle, it is not a fun situation. Sometimes it is gradual, and other times completely sudden. But most of the time, the clutch will not fully disengage, or it will feel funny for some time; then, all at once (or gradually) not disengage at all. When this happens, it renders your vehicle unsafe to drive.
We picked up this YJ for a very reasonable price. It was so reasonably priced that we wondered what was wrong with it. The seller told us he wasn’t aware of any mechanical issues with the Jeep. But, I noticed a bottle of brake fluid lying inside the driver’s door, and when I asked him about it, he said, “the clutch master loses fluid once in a while.” I didn’t think much of it and began driving the Jeep, but within three days, the clutch pedal was on the floor. I tried filling the clutch master cylinder and bleeding it, with no luck. There was quite a bit of brake fluid coming out of the sheet metal cover on the bell housing…great!
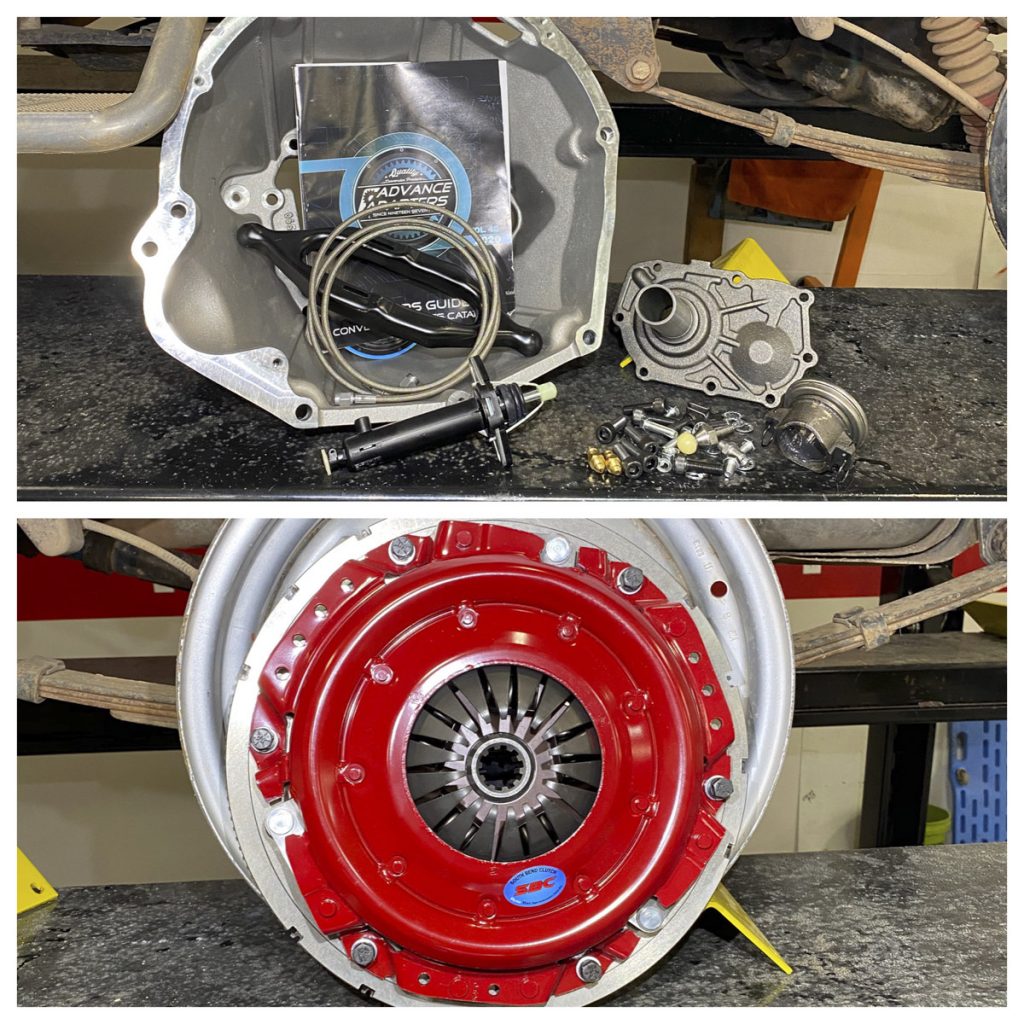
To change the internal slave cylinder, the transmission must be removed. The internal slave is an expandable diaphragm with a throw-out bearing on the end that slips over the input shaft of the transmission. We haven’t had good luck with aftermarket internal slaves, and OEM ones are often not available. These factors made us look for different options. During our search, we stumbled upon a complete change-over kit from Advance Adapters. The kit by Advance Adapters (part # 712590-IR) comes with everything you need to get rid of the internal slave and replace it with an external slave. While we had the transmission out, we thought it would be a good idea to change the clutch and also replace the clutch master. For the clutch, we went with a complete kit from South Bend Clutches. The clutch master was sourced at our local O’Reilly’s auto part store. On this application, the clutch master was constructed out of metal instead of the original plastic. 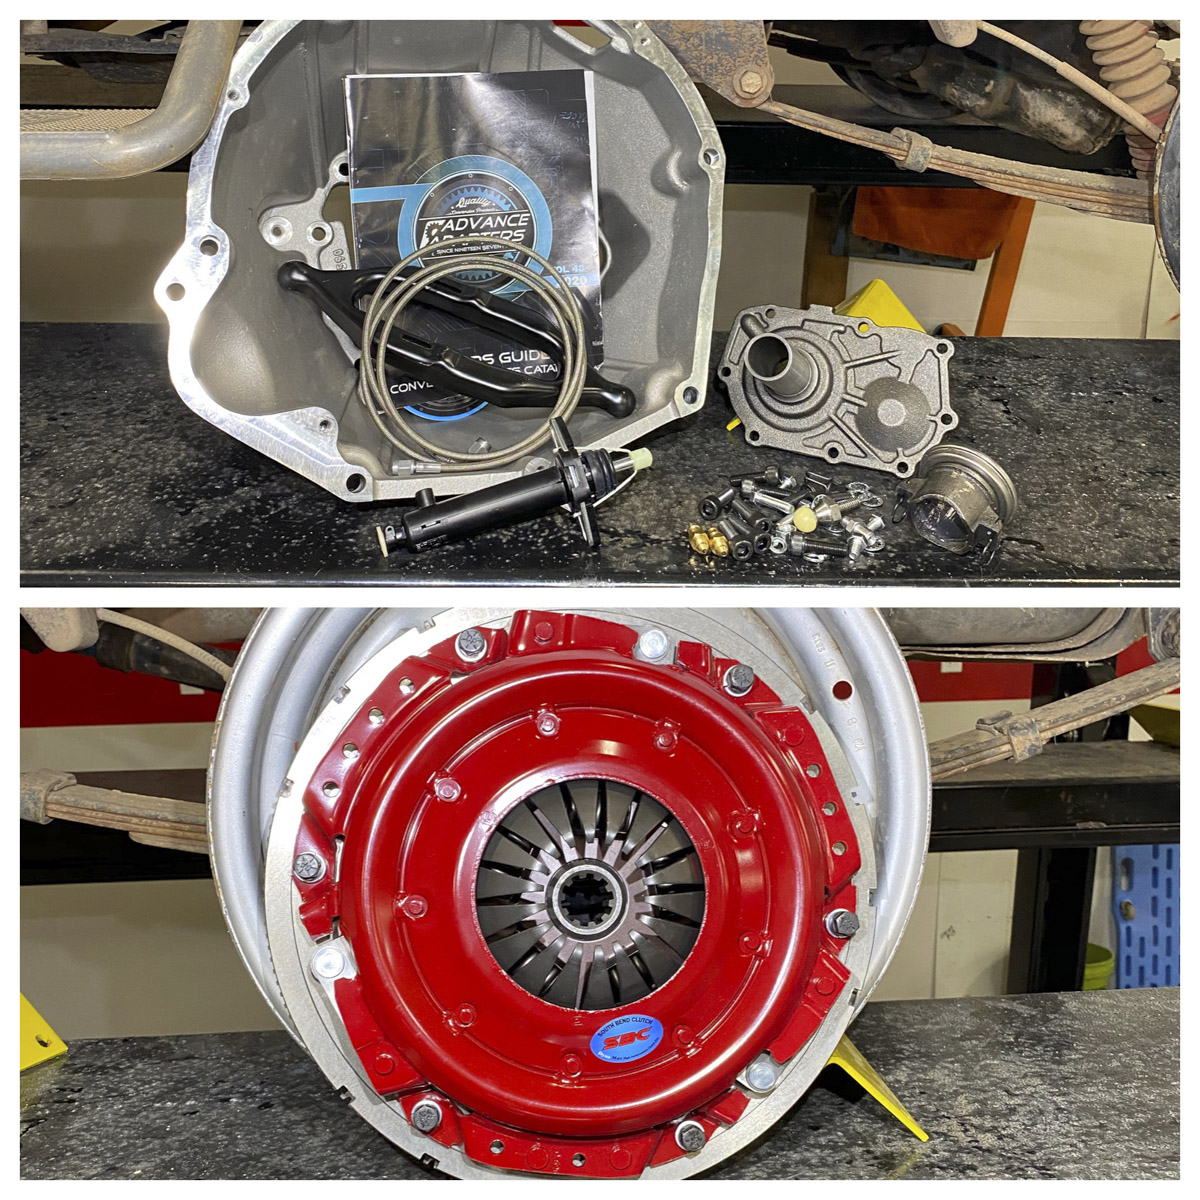
To start the install, the transfer case/transmission shifters were removed. Our luck, the transfer case shifter had been modified, so the whole assembly had to come out. The transmission shifter had also been replaced with an aftermarket shifter that was much harder to take apart than the traditional ¼ turn collar found on AX15’s (pictured in the illustration). Make sure to stuff some rags or tape over the top of the transmission to keep dirt out. 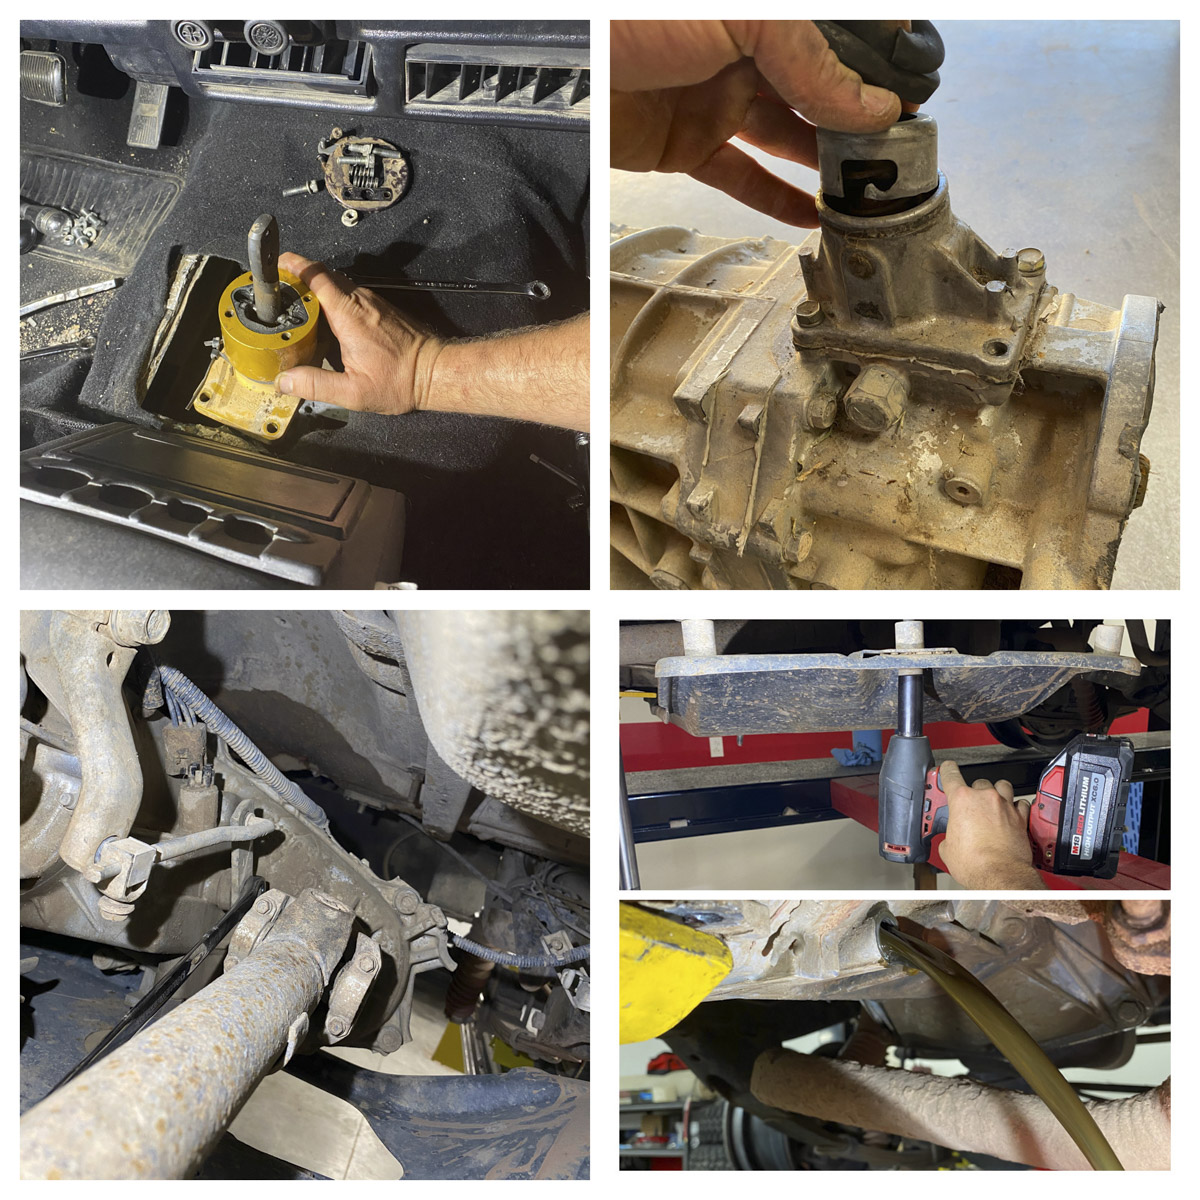 Then all the hoses and plug-ends were removed from the transmission and transfer case. Next, the skid plate and driveshafts were removed. Be sure to support the transmission and transfer case before the skid plate is taken off since the skid plate holds these up. Finally, the transmission and transfer case were drained.
The transmission mount/exhaust mount were removed next to give us more room to unbolt the transfer case. The battery was unhooked, and the starter was removed. Then the transfer case was unbolted and removed, but this is not completely necessary. We took the transfer case out because it is easier and safer to handle the transmission without the transfer case hanging off the back. Finally, the crank position sensor was unbolted and slid out of the bell housing. 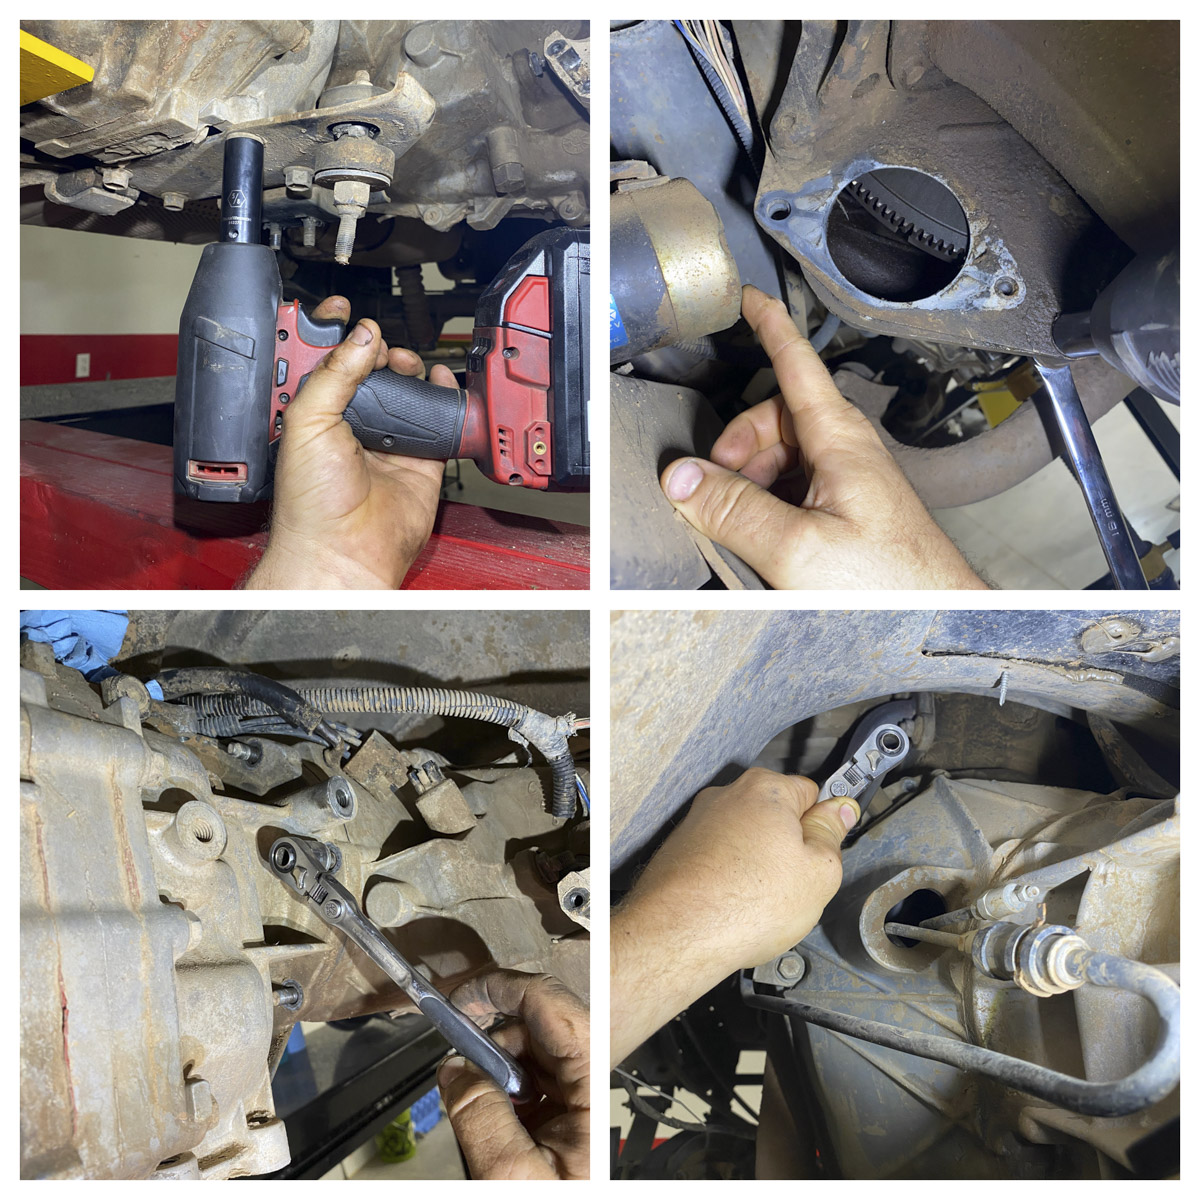
After the hydraulic line was unhooked, with the transmission supported, it was ready to be unbolted and removed. The top two bolts on our application were inverted Torx bolts. The bolts were removed, and the transmission was slid back. We were going to try removing the transmission without dropping the exhaust, but that didn’t work out too well. So, we ended up having to drop it down. Next, the slave cylinder was removed, and as you can see, it had been leaking for some time. Finally, the bell housing, original bearing retainer, clutch, dust shield, and pilot bearing were removed. We used a special puller to remove the pilot bearing. There are other ways to remove this, or similar tools may be rented at local part stores. Next, all the mating surfaces were cleaned. 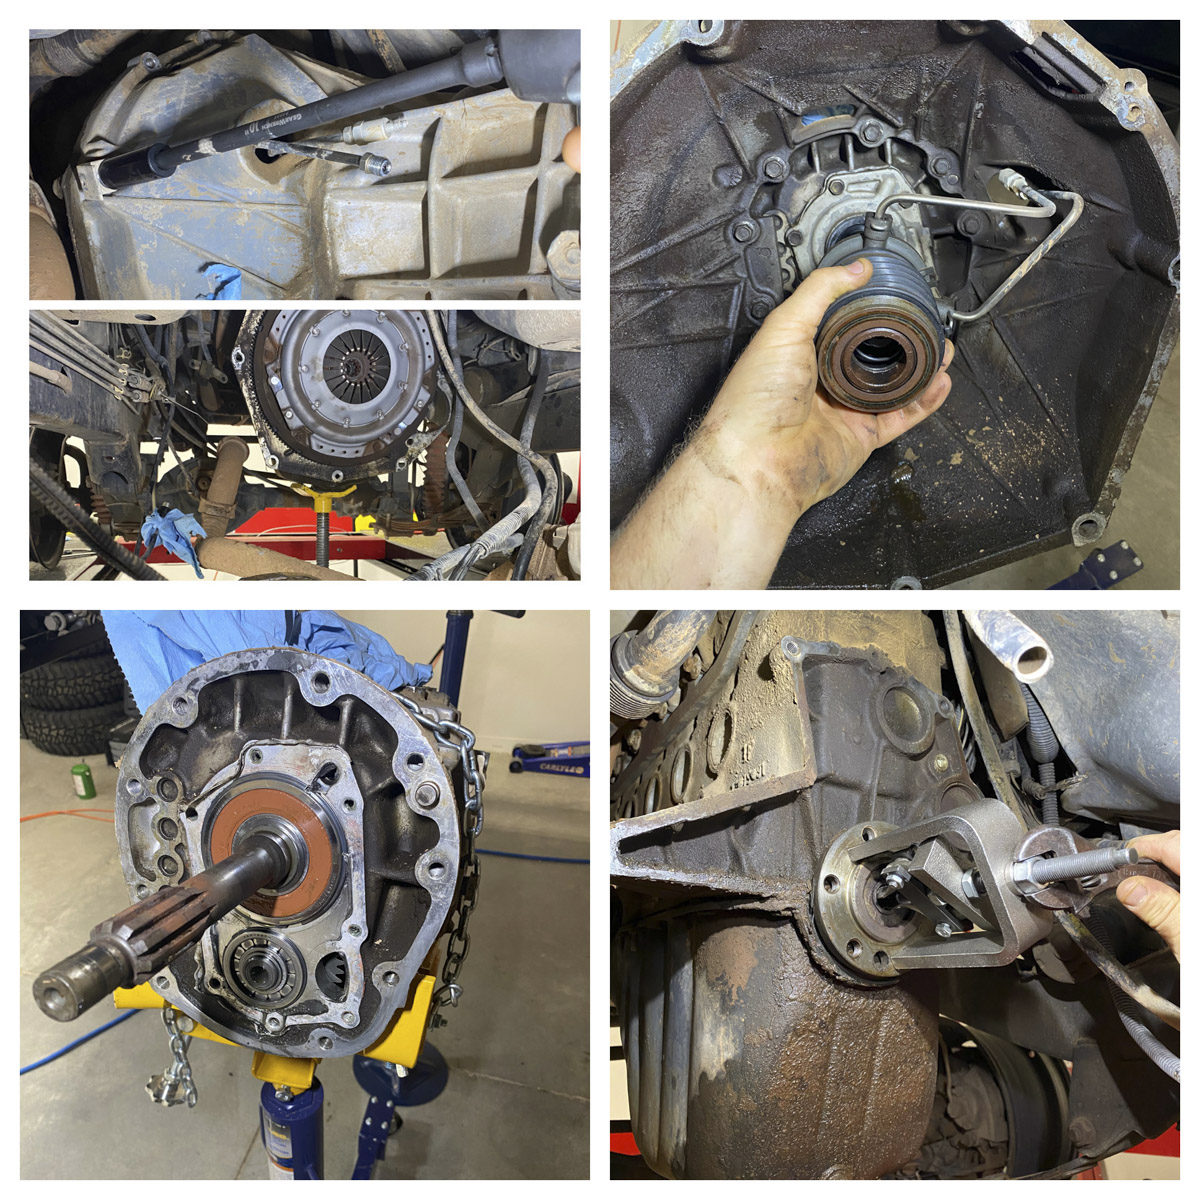
To start the reassembly, a new bearing retainer and bell housing were installed. Then the ball stud, clutch release arm, and throw-out bearing were installed. Due to year variations, we had to get a different pilot bearing than what came in the clutch kit, and, of course, with the new bearing, the pilot tool didn’t work. Finally, the clutch disk and pressure plate were installed. It is important to get the clutch disk in the right orientation, as the raised spring side goes towards the pressure plate. We taped the top of the shifter hole to keep out dirt. 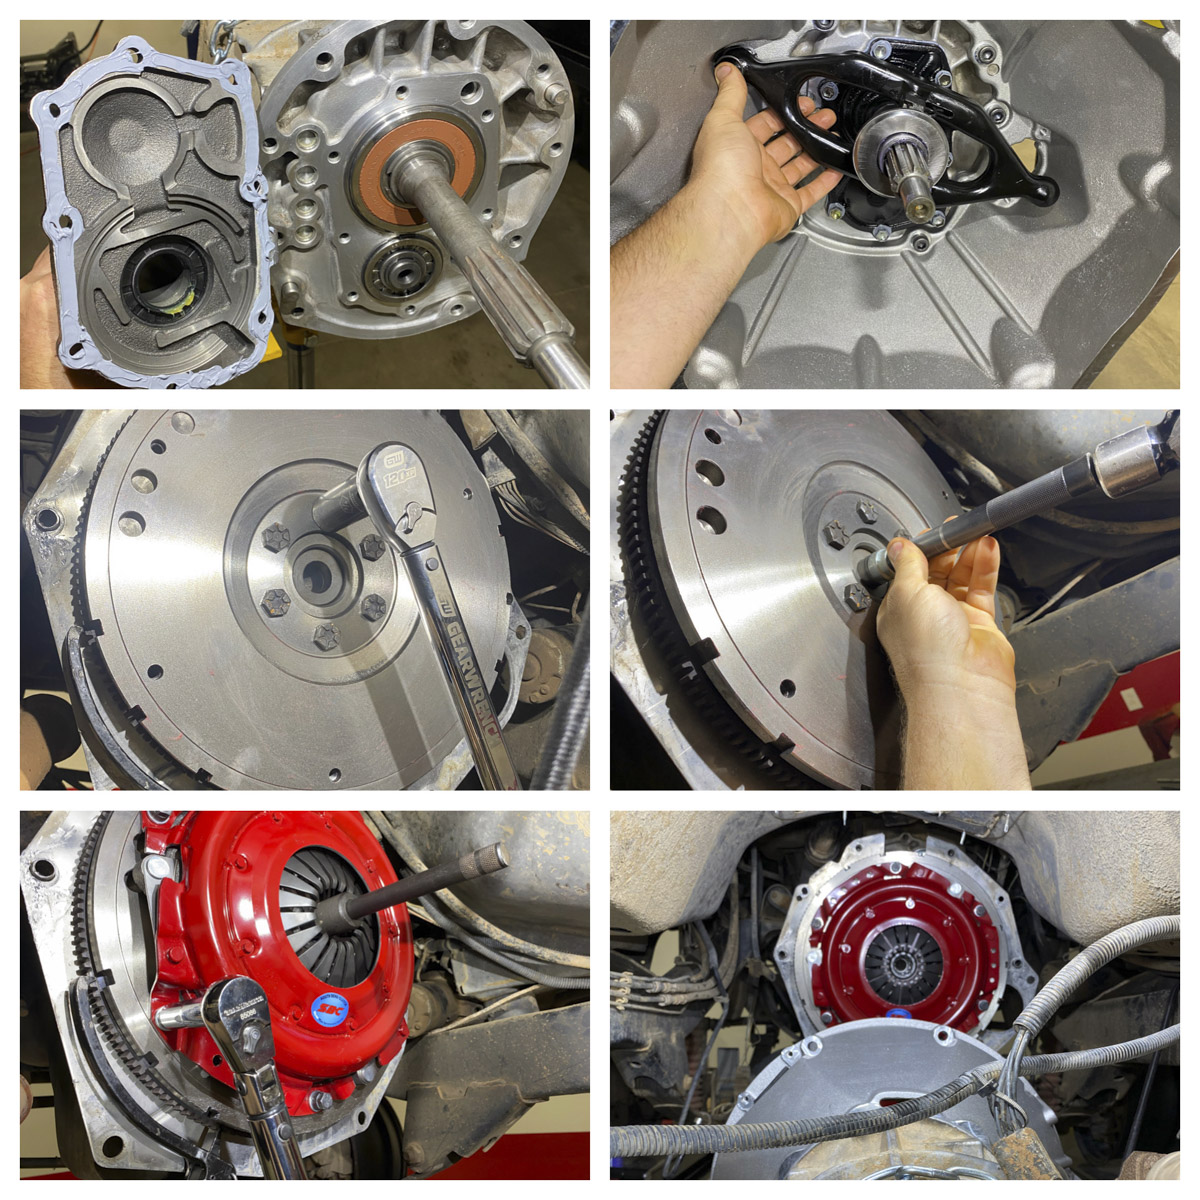
The basic reassembly of the transmission/transfer case was then performed in reverse order from how it was removed. We made sure to refill the transmission and transfer case with the correct oil. You don’t have to drain and refill the transfer case, but we did it for maintenance reasons. There was a lowering kit on the skid plate that we removed. The vehicle is equipped with a slip yoke eliminator, which is not needed with the amount of lift on this vehicle. 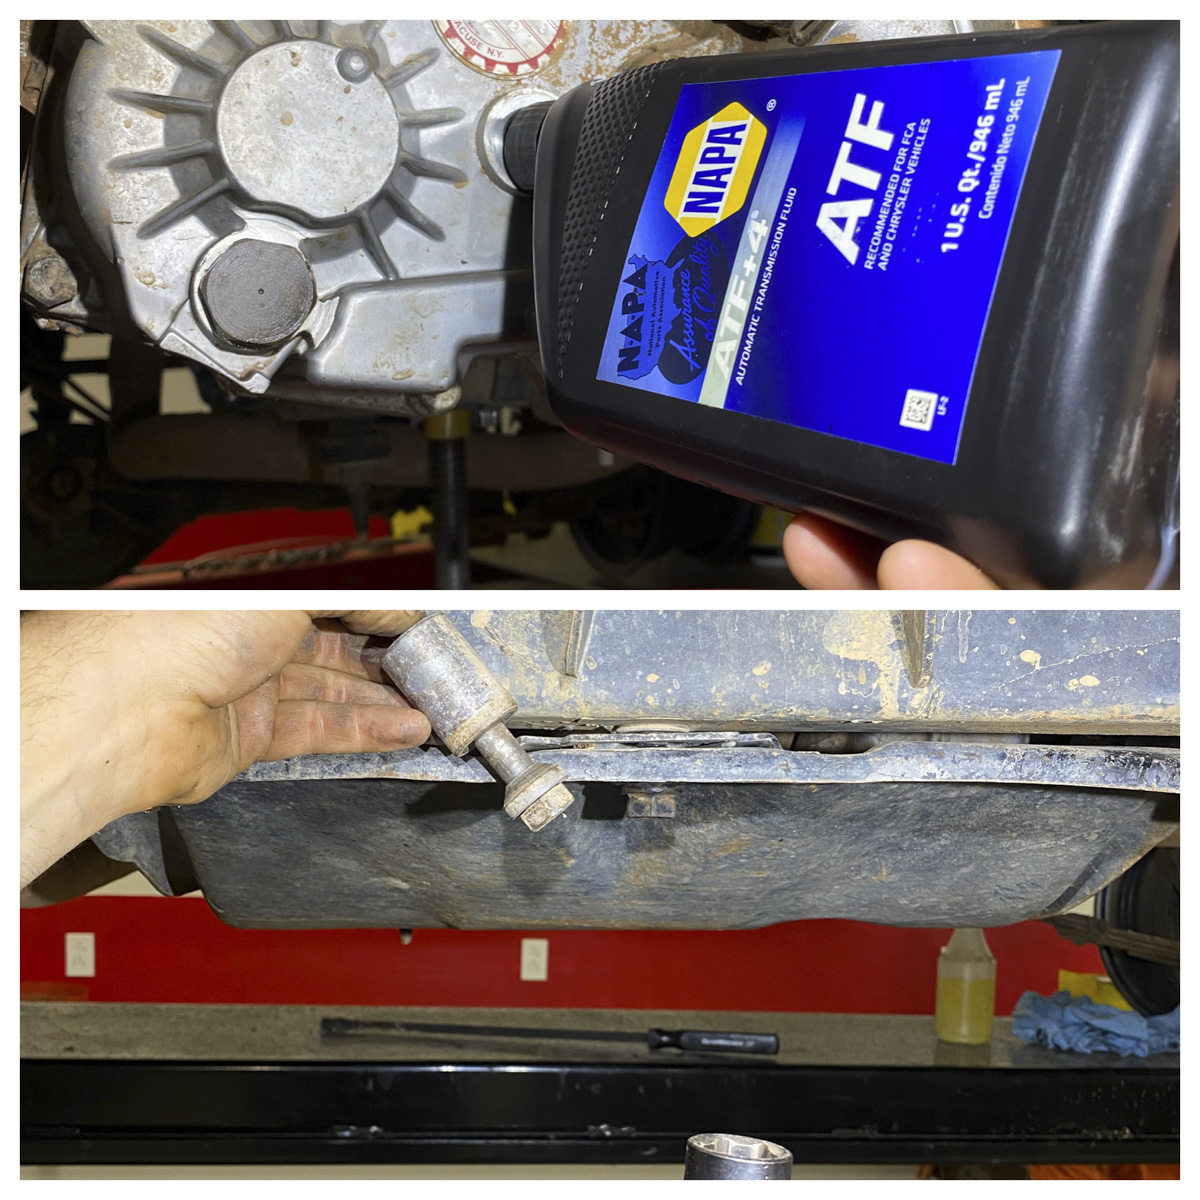
To finish the install, the new supplied fittings were installed on the clutch master and slave cylinder. Then the old clutch master cylinder was removed, and the new one was installed. Next, the stainless hose was attached to the clutch master and run under the vehicle, then hooked to the new slave cylinder. The clutch master was filled. Finally, the cap was left off the master cylinder, the piston clips were unhooked on the slave cylinder, and the piston was pumped until no air bubbles were present in the master cylinder.
The clips on the slave cylinder were hooked back up, and the slave cylinder was bolted into position. The fluid level was checked, and the stainless hose was zip-tied safely into place away from sharp, hot, and moving objects. Now, you are no longer a slave to your rig! 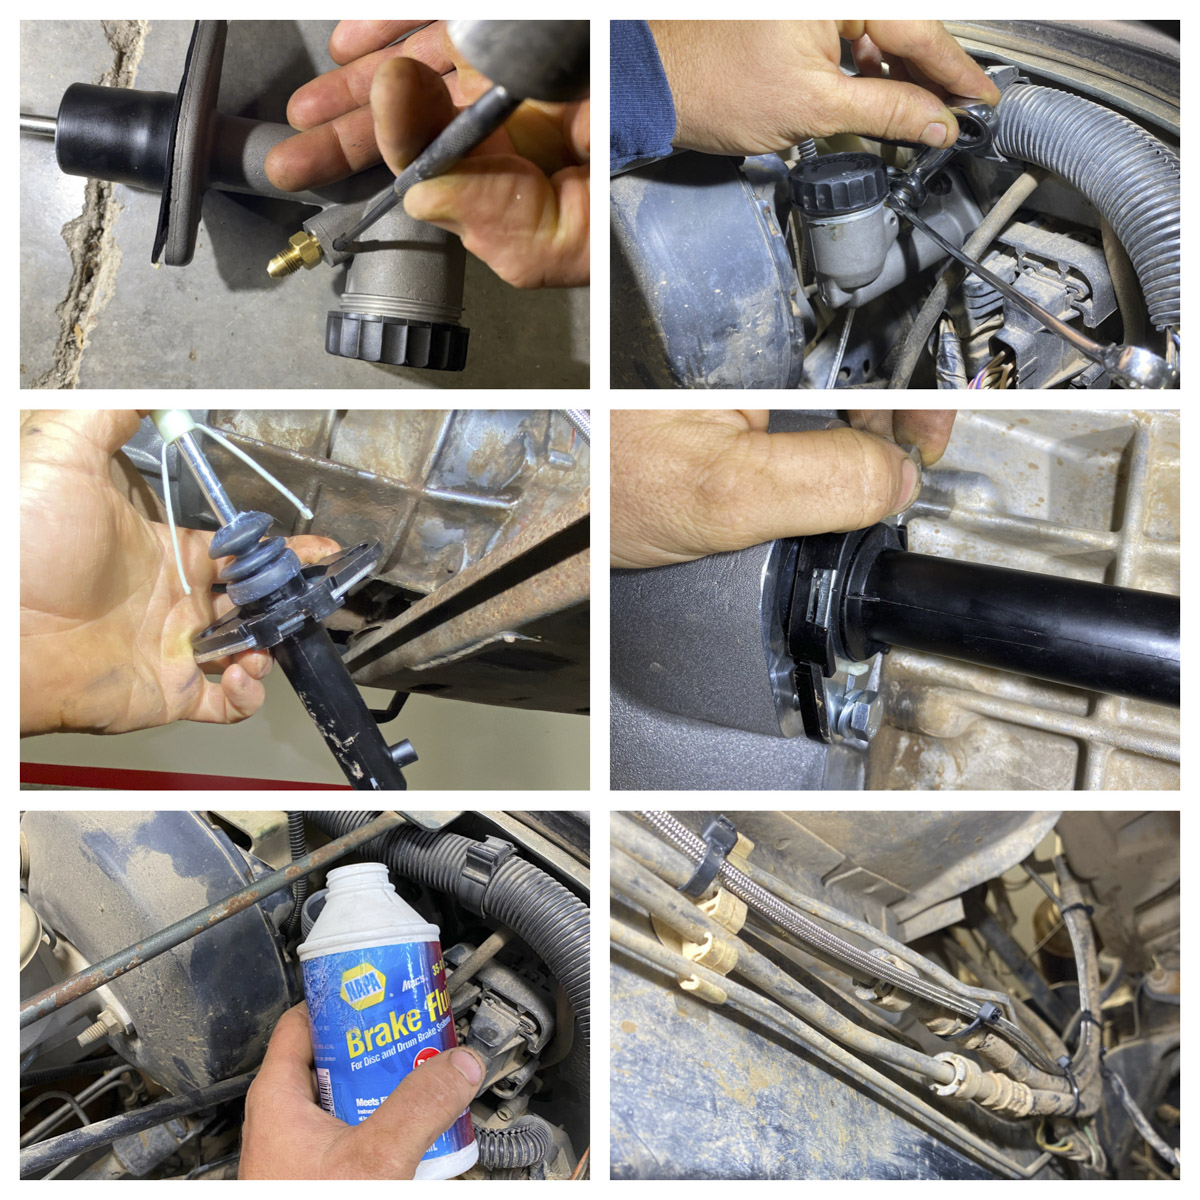
Sources:
Advance Adapters
4320 Aerotech Center Way
Paso Robles, CA 93446
1-800-350-2223
www.advanceadapters.com
South Bend Clutch
709 W. Jefferson Blvd.
Mishawaka, IN 46545
1-574-266-5064
www.southbendclutch.com
GEARWRENCH
APEX Tool Group
910 Ridgebrook Rd. (Suite 200)
Sparks, MD 21152
800.688.8949
www.gearwrench.com
Napa Auto Parts
1-800-538-6272
www.napaonline.com
Parts Used:
Advance Adapters:
Bell housing/slave kit (712590-IR)
South Bend Clutch:
Clutch kit (KO134-HD-O)
Flywheel (NFW2003)
Napa:
1000lb Transmission Jack (791-7100)
3.5 Ton Service Jack (791-6420)
Pilot Bearing (SCE129)
O’Reilly Auto Parts:
Clutch Master Cylinder (CM1301)

