Originally Published in Issue 31 of 4Low Magazine
Make sure to subscribe to get the newest issues of 4Low Magazine right to your mailbox. CLICK HERE
By Christian Sturtz, [email protected]
Photos by Christian Sturtz
The new process 231J is arguably the best overall transfer case installed in a Jeep from the factory. It’s not the strongest, nor does it have the most features, but if looked at as a whole, it’s a great package. They are readily available, inexpensive, fit various applications, have a decent low range (2.72 to 1), easy to work on, large aftermarket parts support, quiet, smooth operation, moderately strong, and lighter than cast iron.
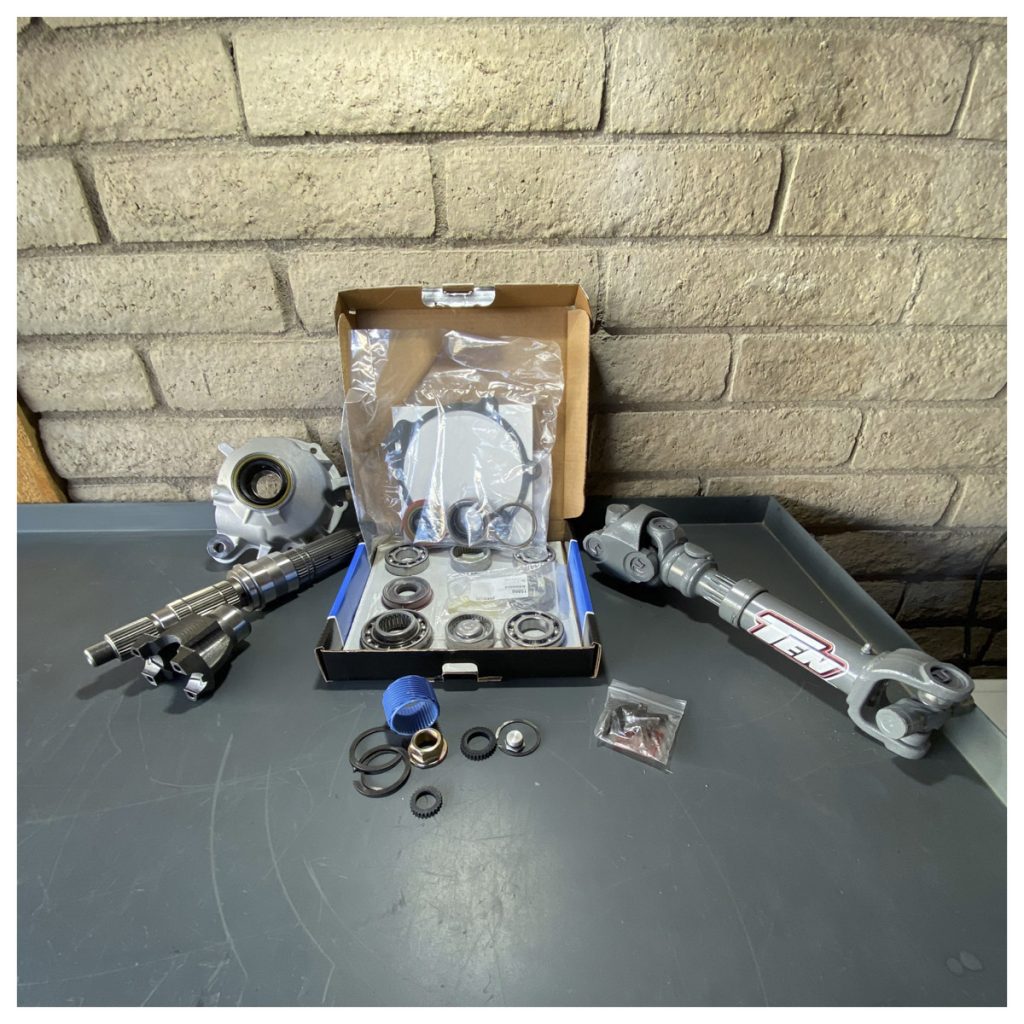
In this article, we are going to cover the installation of a Ten Factory slip yoke eliminator (SYE) kit. We will also overview the teardown and reassembly of the 231J. The advantage of installing a SYE is that it gets rid of the weak failure-prone slip yoke, and it allows you to run a longer rear driveshaft, which gives you a better driveline angle. Additionally, a SYE would enable you to remove a transfer case drop (on equipped vehicles), giving you more ground clearance. 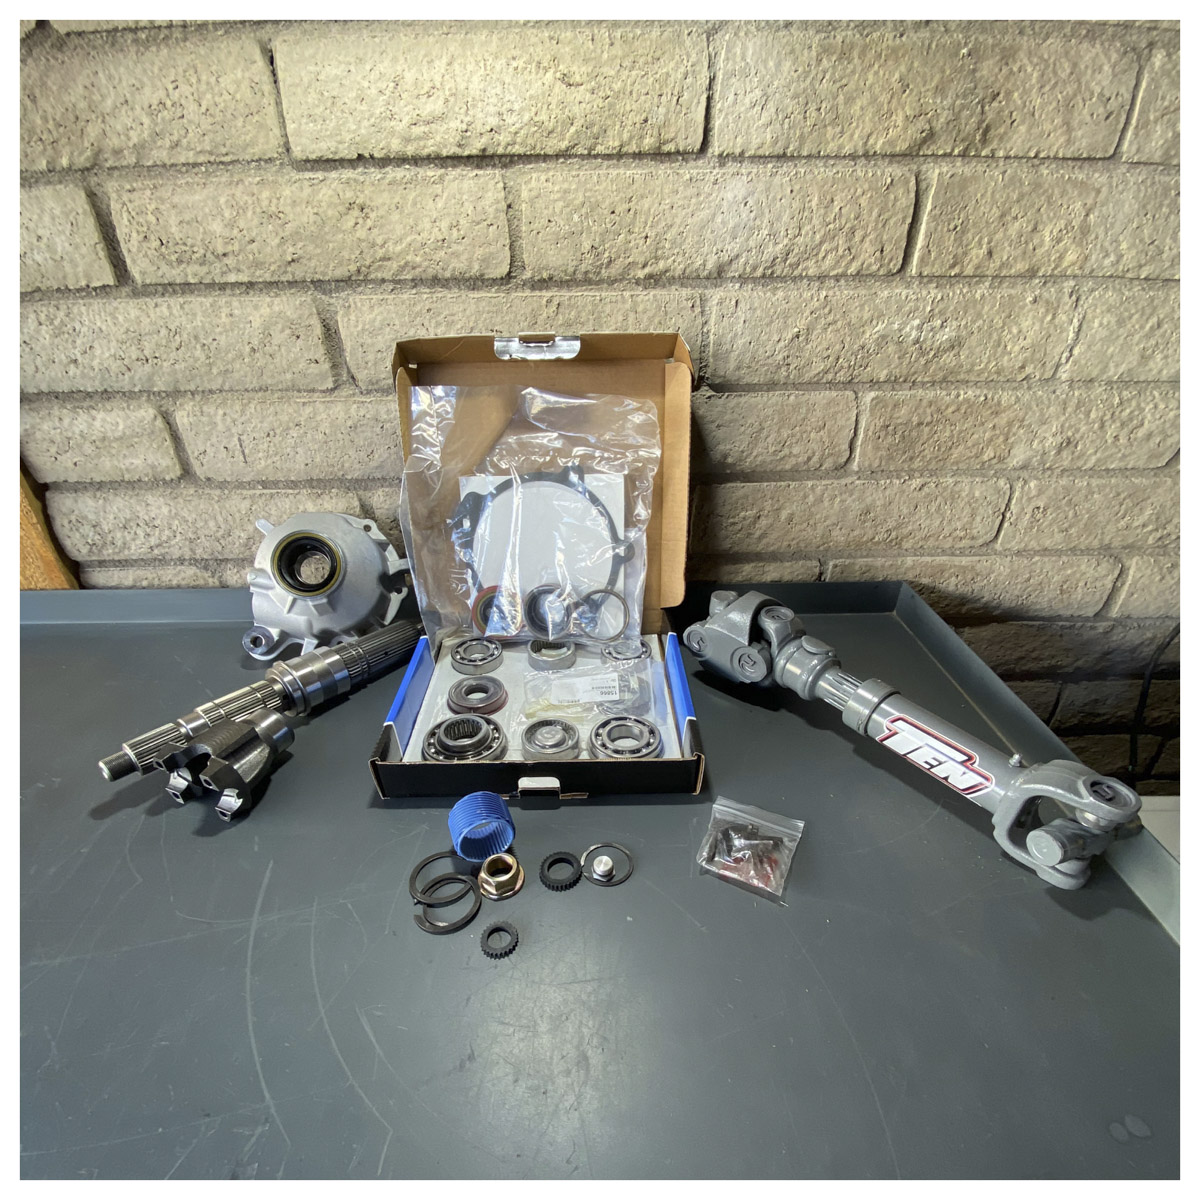
We started the disassembly by draining the case, removing the 4×4 indicator, detent, and speedo drive. Then the slip yoke boot, dust shield, rear output seal, and snap ring were removed. Next, the rear tail shaft housing bolts are removed and the housing is carefully pried off the back case half. Finally, the front output yoke is removed. The two cases, once unbolted, are now ready to be split. It is important to pay attention to the bolt and harness tab locations by taking pictures or marking them. There are 3 different bolts going through the two case halves. 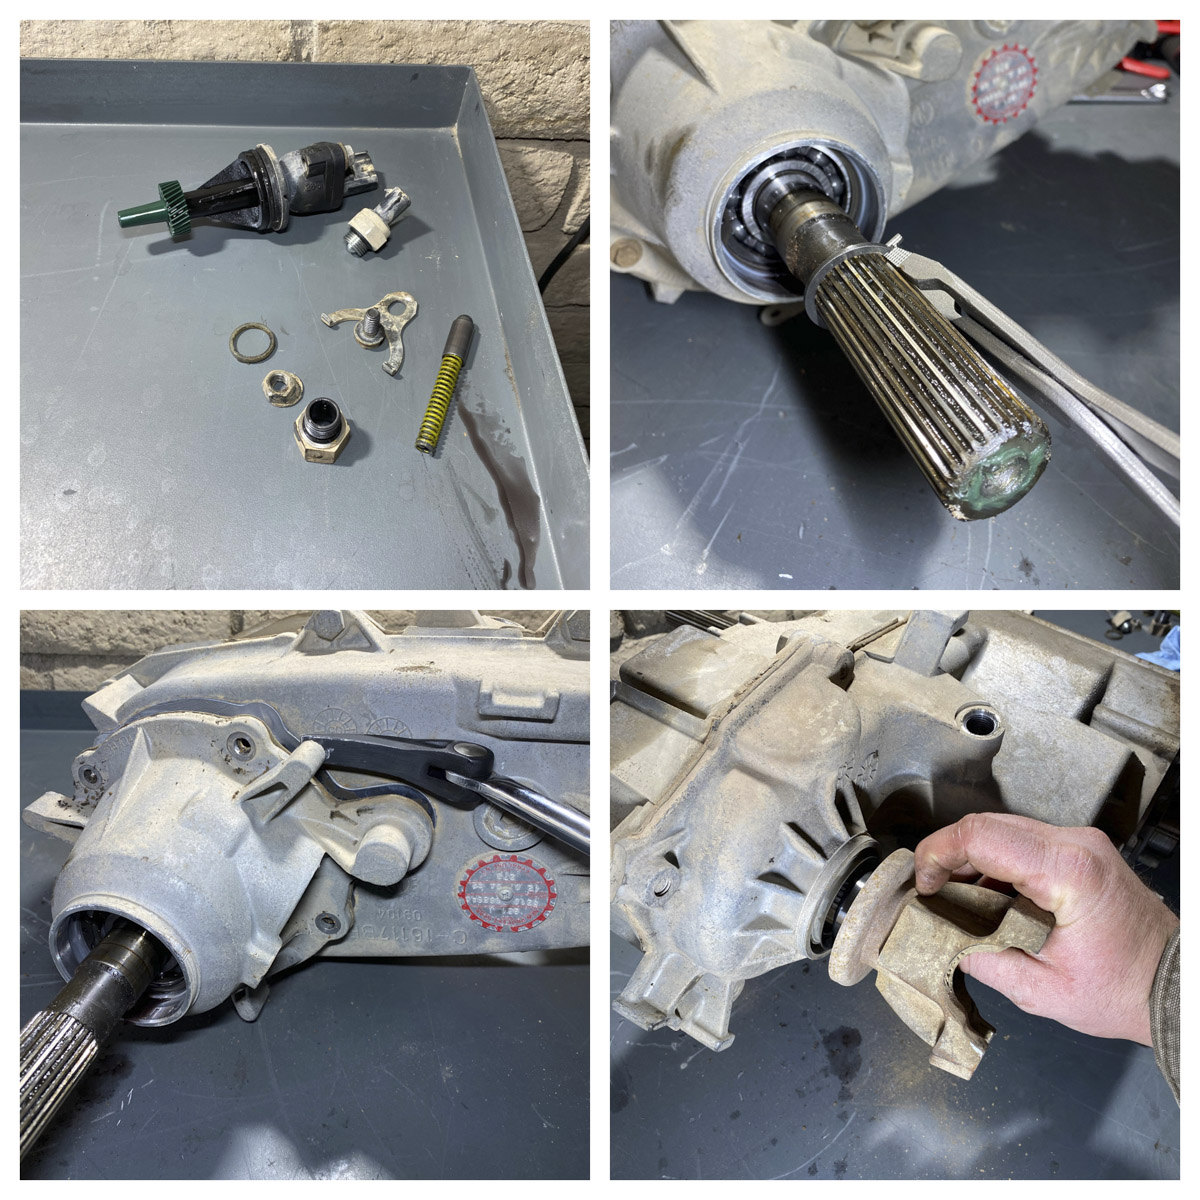
Two of the bolts that go through the case halves have washers. These bolts are longer and go through the line up dowels for the two case halves. Next to these are notches for splitting the case. After all the bolts are removed, insert a large flat screwdriver into each and twist and/or gently pry the case halves apart. This is a great time to take a few pictures to help with reassembly. Then slip the rear case half completely off the shaft, remove pump, and pickup. To finish disassembly on the rear case half, remove the bearing from the case. To remove this bearing, you will need a collet type puller, which often can be rented/borrowed from local parts stores. 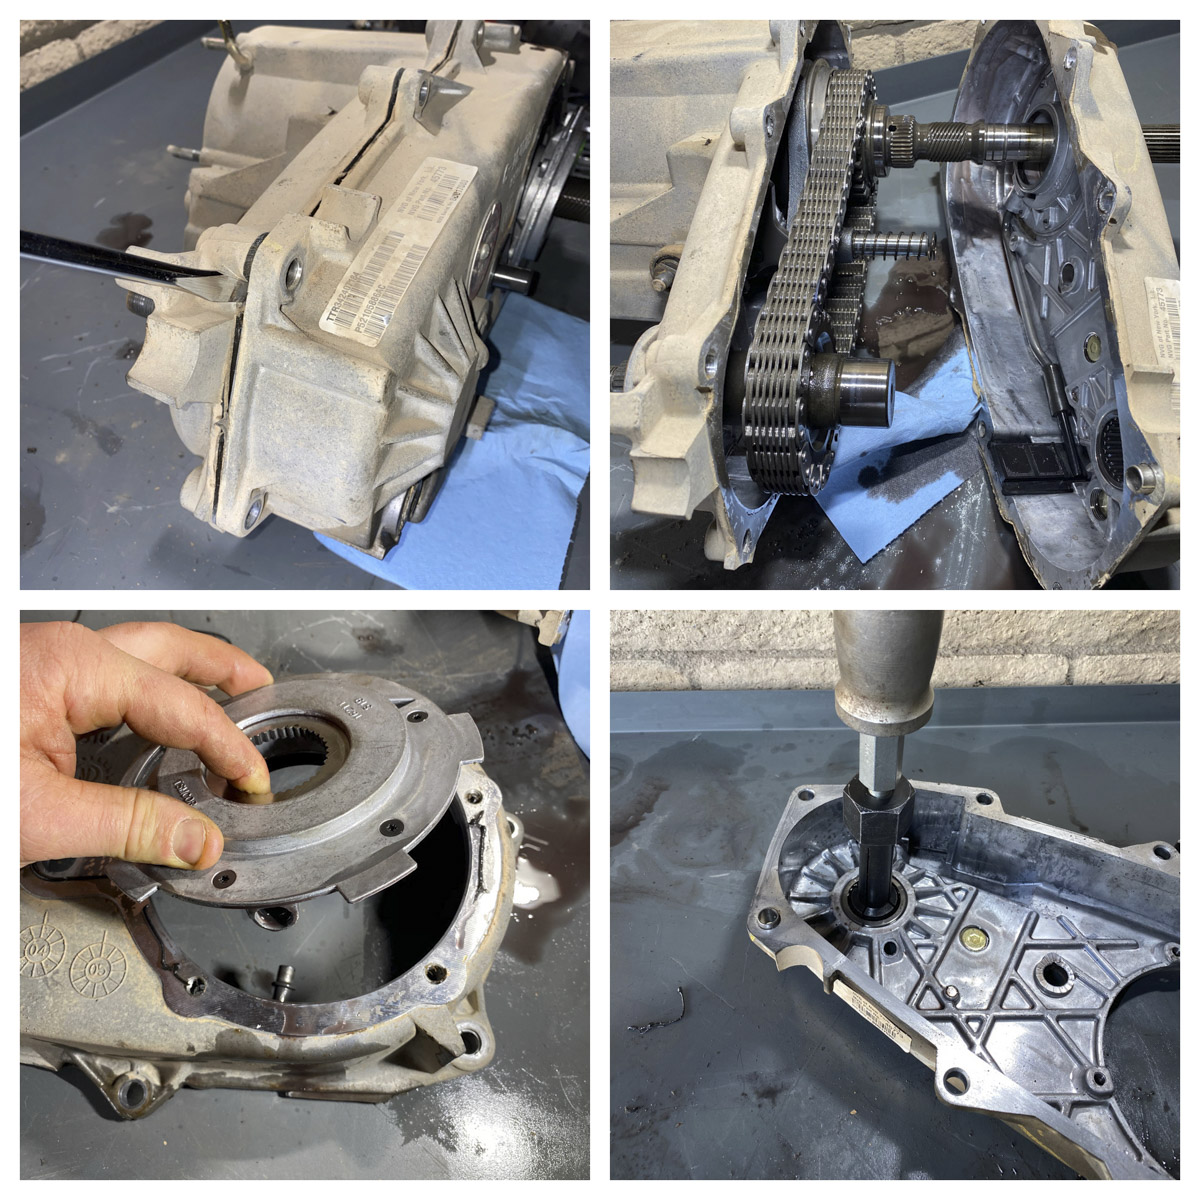
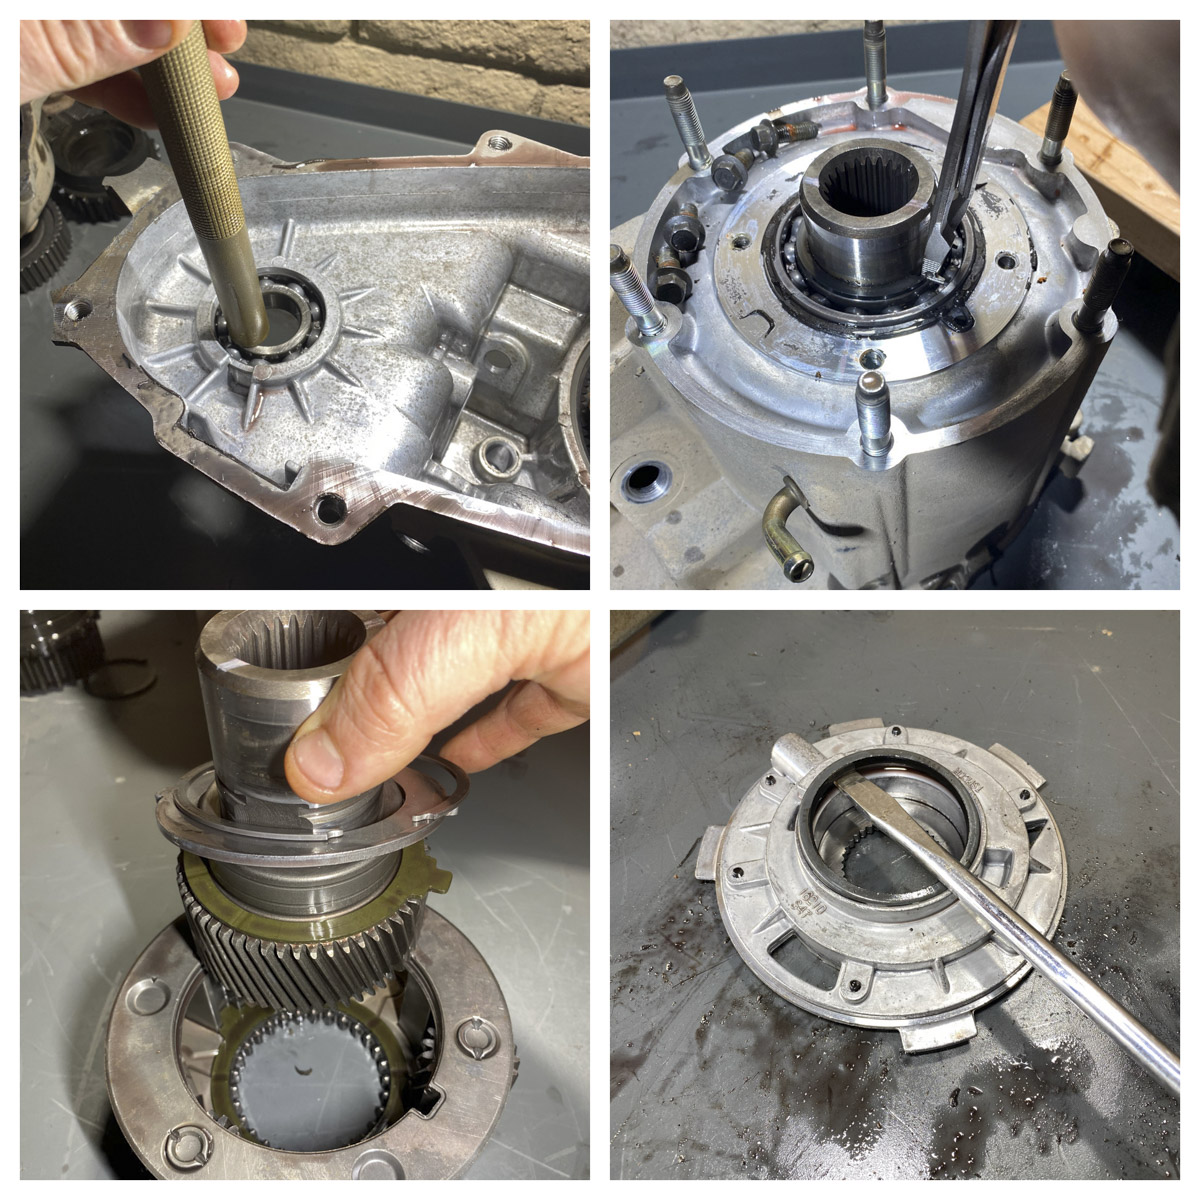
To start the front case half, remove the shifter shaft spring and slide the two shafts out of the case. Then disassemble the main shaft by removing the snap ring and slide the gears off. Next, remove the two shifting forks, the mode, and range sliders. Pay attention to the direction of mode slider- this is the only part that could be easily reinstalled incorrectly. Finally, slip out the shifter comb and remove the magnet. 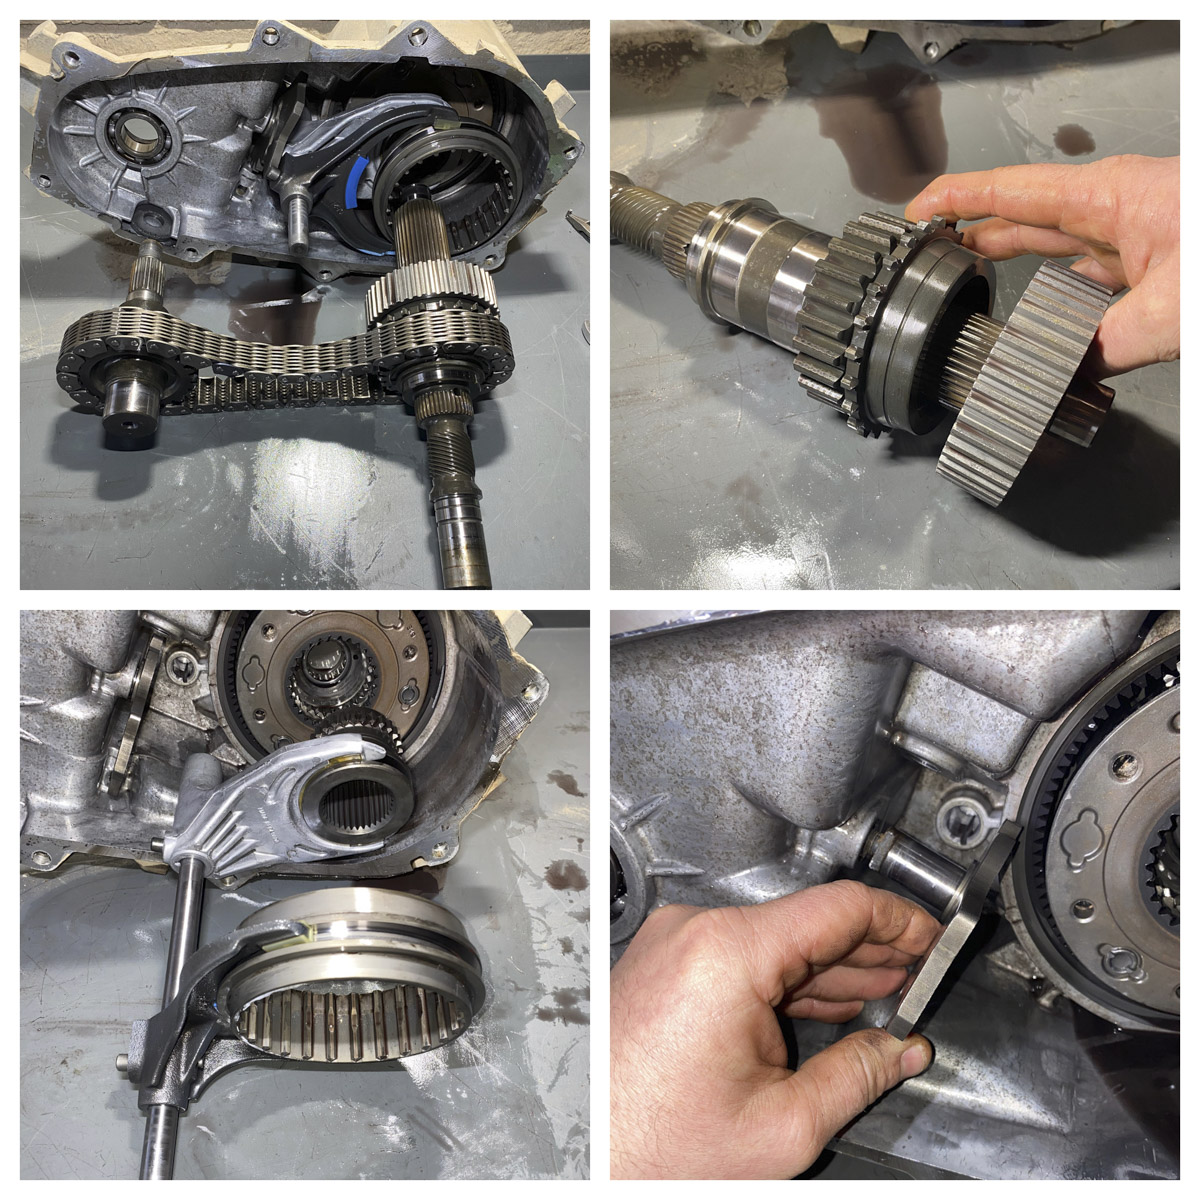 To finish up the front case half remove the plastic spacer and O-ring from shifter comb hole. Remove seal, snap ring, and bearing from the front output hole. Then remove input shaft seal retainer, snap ring underneath it, slip the planetary set out, and knock the bearing out of the front of the case. Next, disassemble the planetary set and knock the pocket bearing out of the input gear. Be sure to pay attention to the order of the planetary set and the depth of the pocket bearing. Finally, knock the seal out of the input shaft seal retainer and pop the seal and O-ring out of the oil pump.
Before the reassembly, all of the parts should be cleaned and inspected. This is when we noticed two problems. First, the support hole through the rear case half for the shifter rail was wallowed out and oval-shaped. Second, the range shifter fork had excessive ware. You can see in the illustration the difference in the original case half and the replacement one we got from a local transmission rebuilder. Reminder they will need casting numbers if you have to get case halves. We wanted an additional low range option that would not require 4-wheel drive and the range fork needed replaced. So, this was a good time to install a 2Low kit by Teraflex that comes with a new range fork and shifting-comb. You could also just replace the original non-serviceable range fork if you did not want the 2Low option. Range Forks are available at suppliers, such as Transtar. We also choose to replace the chain with a factory replacement and upgrade to a 6-pinion planet. 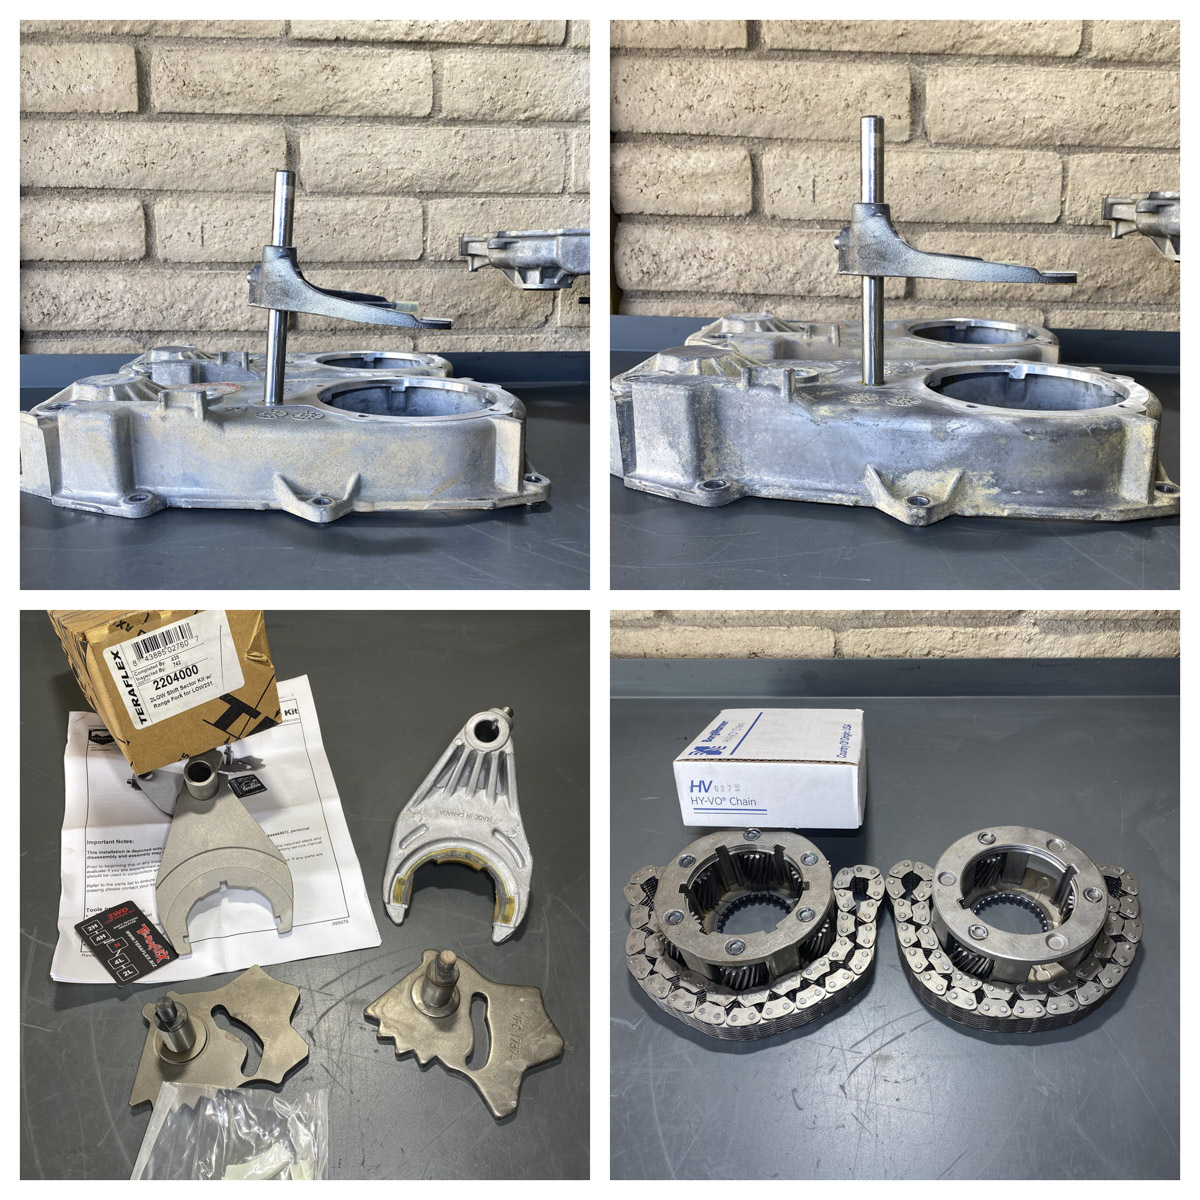
To start the reassembly, install the new cup bearing in the input gear. It is always a good idea to put a little sealant around the outside of the cup bearing. We assembled the planetary set with the new 6-pinion planet, installed a new input bearing in the front case half, slid the planetary set into the new input bearing, and retained it with the original snap ring. The snap ring for the original main shaft and the input gear are very similar, but the input gear uses the thicker of the two. Be careful with the input gear and the bearing because there is a thick and thin version (pre-1994 models use thick, post-1994 use thin). A safe way to do it is to match the bearing/new parts as you go to ensure the parts are correct. Next, drive the seal in the input seal housing and put silicone sealant on the back of it along with the threads and bolt it down. Finally, we installed the front output bearing, placed the retaining snap ring, and drove the seal in. 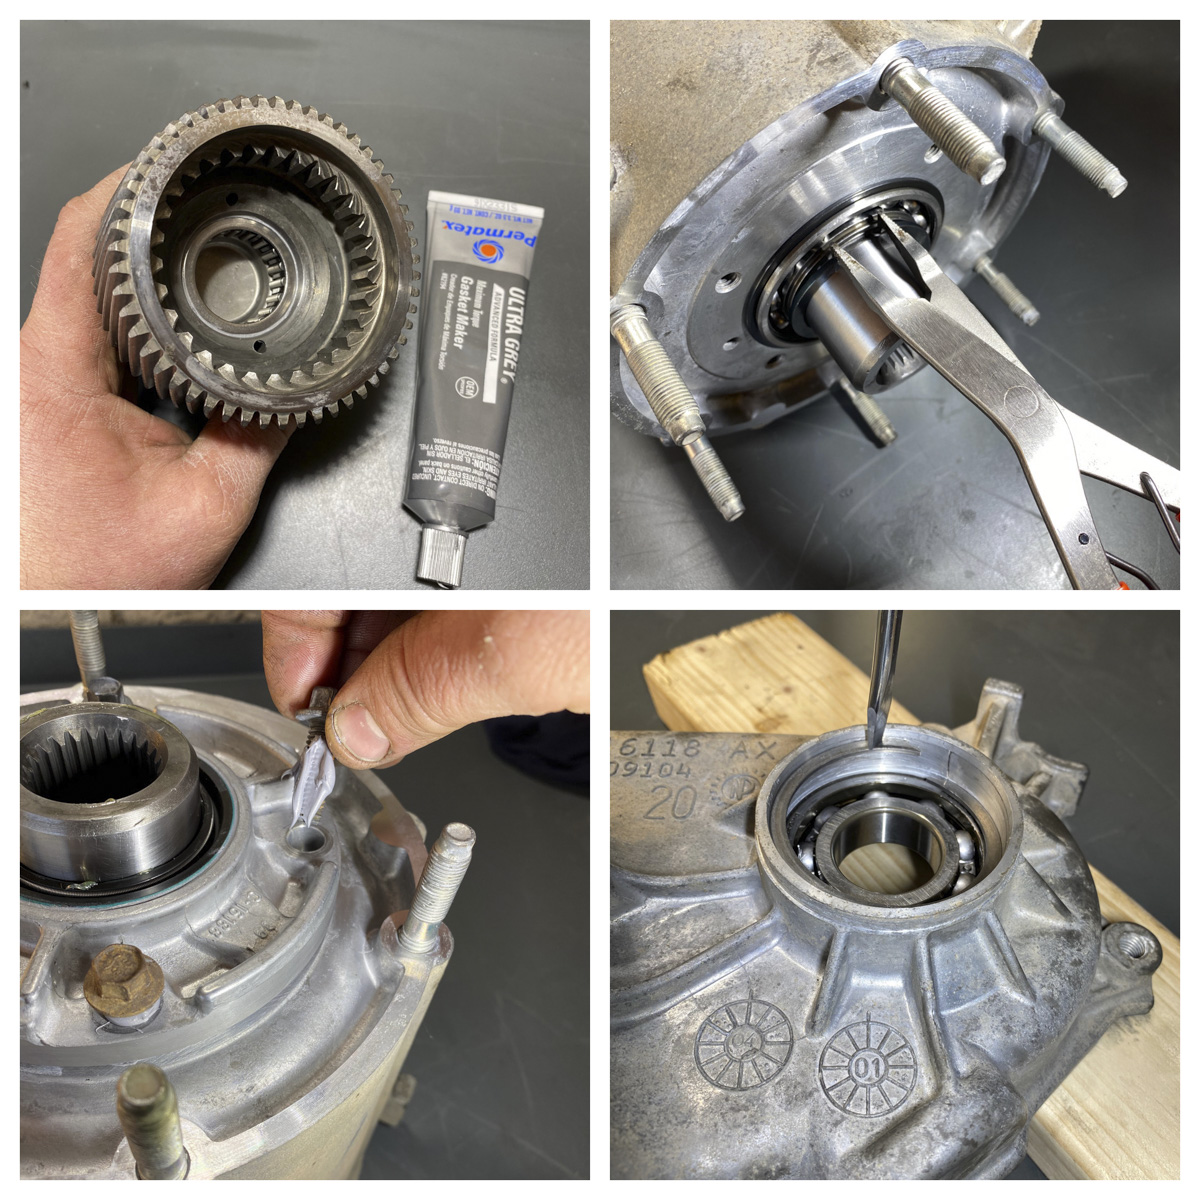
The front case half was flipped input down and the magnet was placed back in its keeper. The new comb shaft was lightly coated with grease and installed in the shifter shaft hole. Then the range slider and range fork were installed. Next the mode fork/shifter shaft and the mode slider were installed. The chamfered side of the gear should be facing up and make sure the guides for the range and mode sliders are in/on the comb. Finally, the seal and O-ring were installed in the pump. 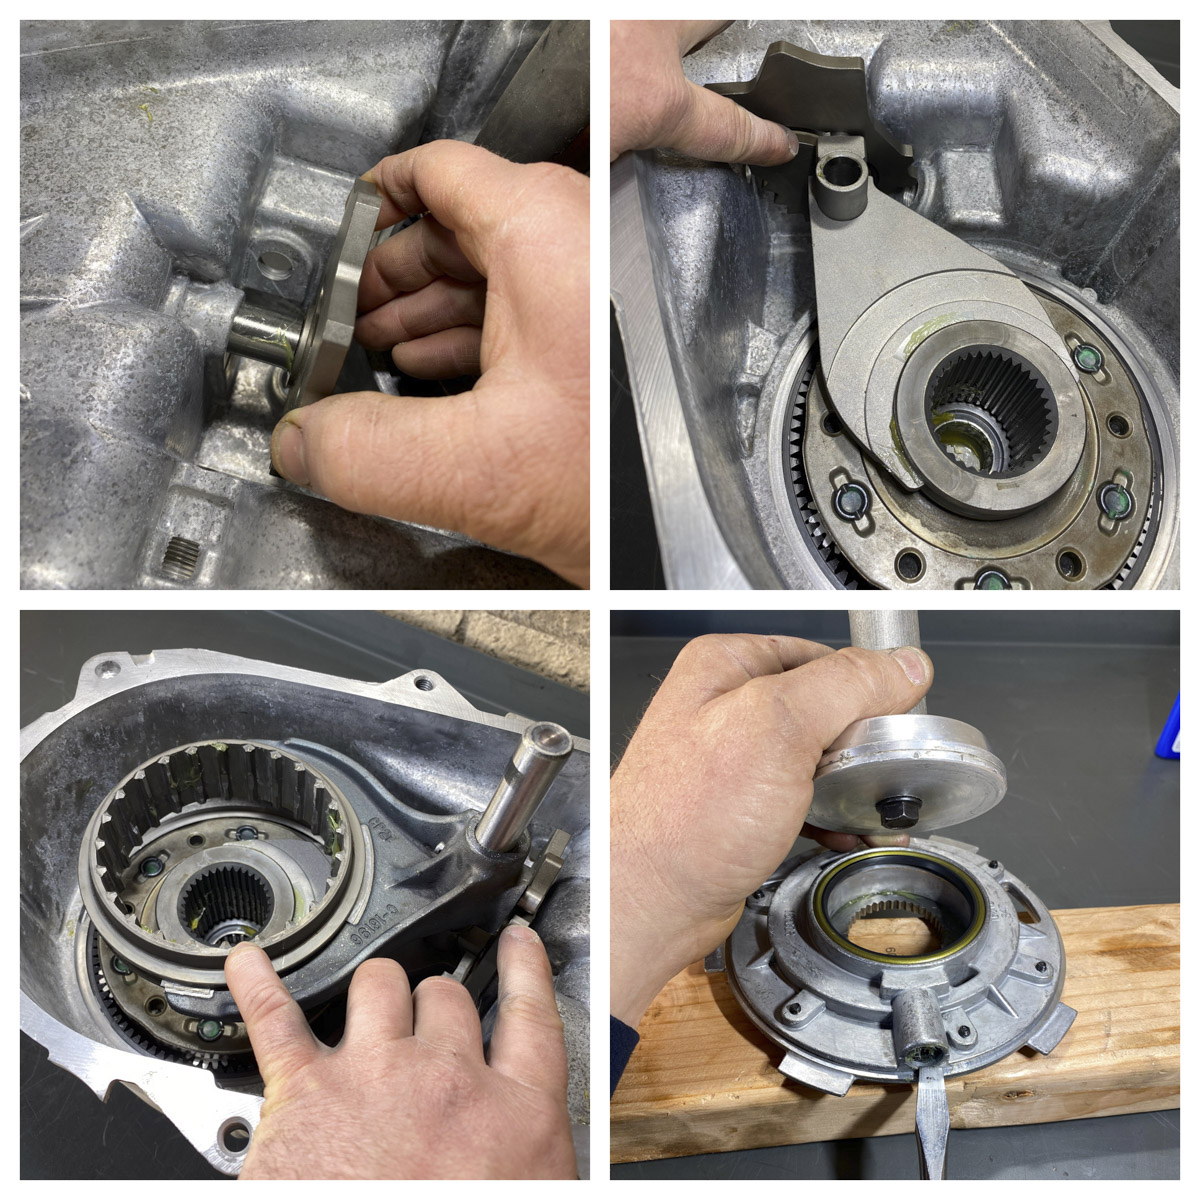
On to the rear case half … we drove the bearing into the rear case. Make sure that you don’t set the cover flat on the bench when you do this as it will crack/bust the case. Only drive the bearing in flush with the face, don’t bottom it out. Then the pump was slid on the new main shaft and the new speedo gear was retained with snap rings. Next, the original gears were slid on and retained with a snap ring- the yoke at this time is only being used to hold up the shaft. Finally, the new main shaft is slid into the rear tail housing, yoke is installed/tightened and the shifter rail hole is plugged with supplied plug. Make sure the tangs on the pump are in the correct place and seated before you tighten the yolk, otherwise it will break the pump. Also, it is a good idea to use the supplied sealing washer and some sealant to prevent leakage through the splines of the yoke (this applies to the front yoke, later installed, also). 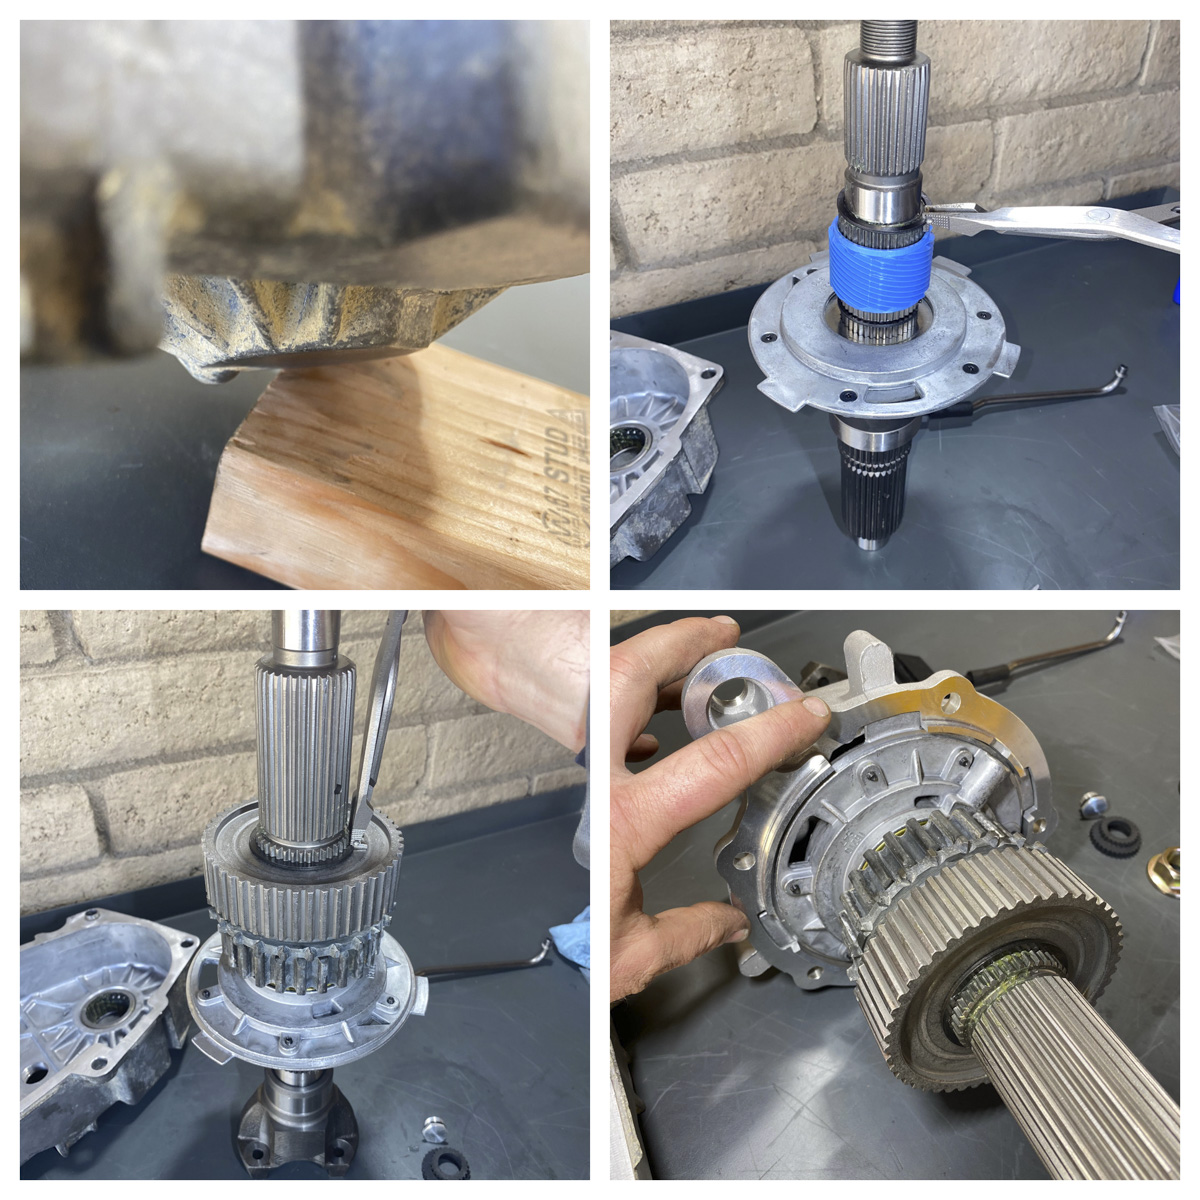
To finish the whole thing up, the rear yoke was set up on the table and the rear case half mating surface was coated with silicone along with the threads on the bolts and the two were bolted together. Then the front output shaft and the new chain were installed along with the pump pickup. Next, the shifter shaft spring was placed on the shaft and one case half sealing surface was coated with silicone sealant. Finally, the two case halves were slid together and bolted and the front output yoke and nut was installed. It may be necessary to move the mode slide a little bit or turn the output to get the two case halves to slide together. The speedo drive, 4×4 indicator, detent, and the shifter shaft spacer/O-ring go in just like they were removed. Replace the O-rings on these components if necessary/available. Let dry overnight before finally filling with recommended ATF+4 or equivalent. 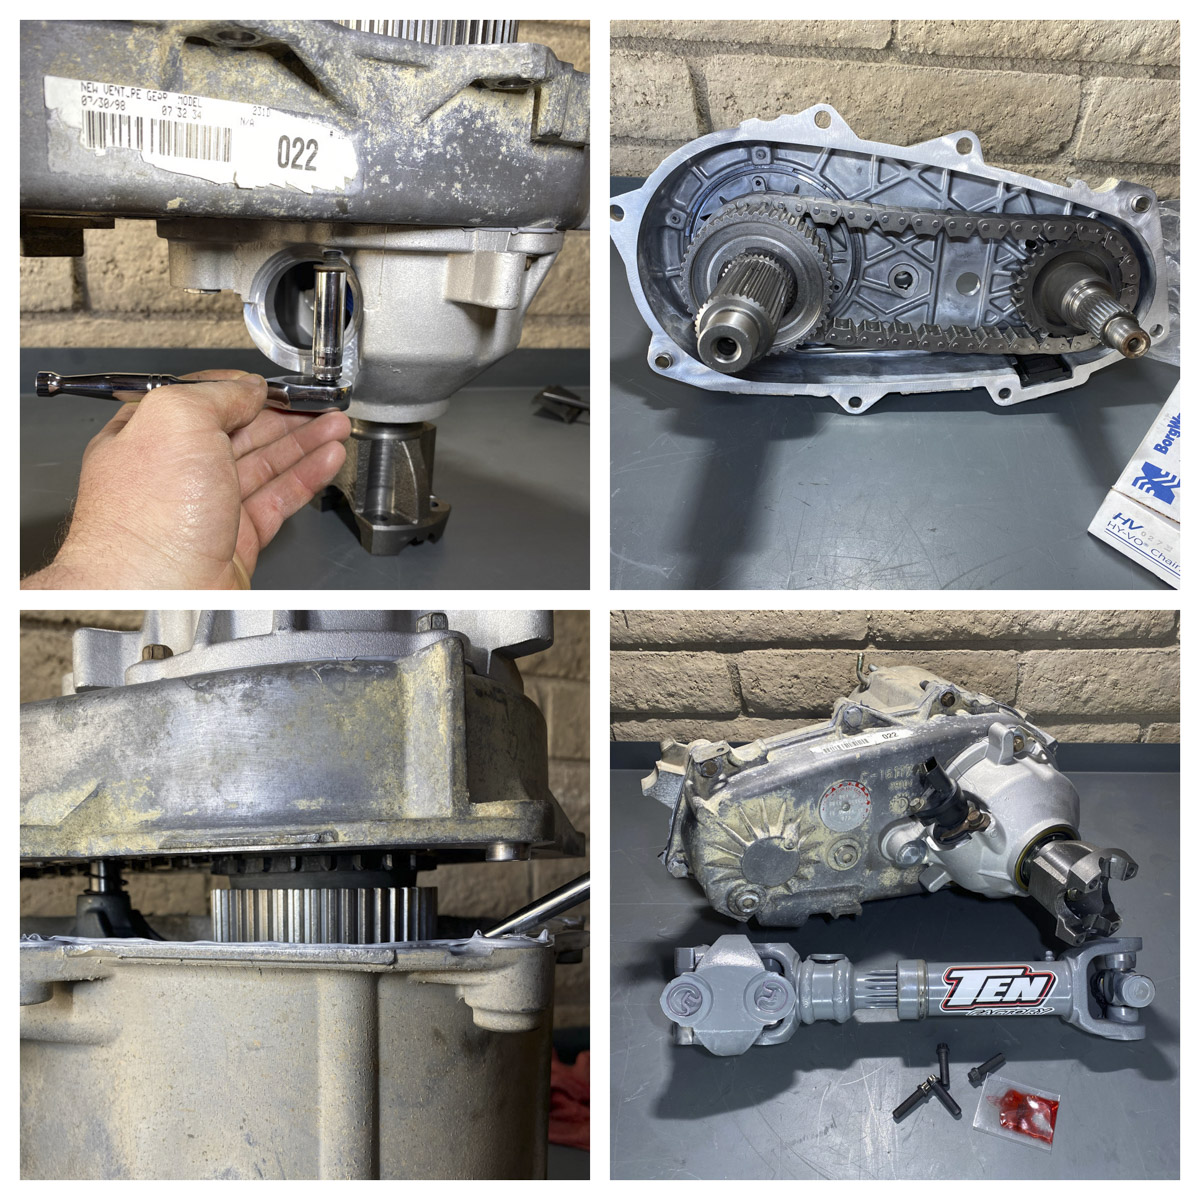 Motive makes several different heavy-duty drive shafts; check if there is one for your application.
Part Numbers Used:
Motive Gear/ Ten Factory
- Bearing Kit 231 (1994 and up) (T231RL)
- SYE (TFR231-SYE)
- Drive Shaft (TFR1310-2135)
Teraflex
- 2Low shift kit (2204000)
Transtar
- Chain (HV-027)
- 6 Pinion Planet (351588A)
- Trust Washers 2x (411215)
Sources:
Motive Gear/ Ten Factory
1001 W. Exchange Ave.
Chicago, IL 60609
800-934-2727
Teraflex INC
5680 W. Dannon Way
West Jordan, UT 84081
801-713-3314
Transtar Industries
7350 Young Dr.
Walton Hills, OH 44146
855-872-6782

