Product Highlight, Tech
AUTOMOTIVETOUCHUP: THE SIMPLE D-I-Y SOLUTION FOR PAINT REPAIR
AUTOMOTIVETOUCHUP: THE SIMPLE D-I-Y SOLUTION FOR PAINT REPAIR
Article by @automotivetouchup
No driver is immune to the perils of chips, nicks or scratches to their vehicle’s paint. Rocks fly up from off the highway, other drivers open their car doors and hit the car beside them or teenagers drive their parents’ car without their permission only to bump something. The list goes on and on.
It seems our Jeeps and pickups are especially prone to paint blemishes from trail riding as well as other off-road excursions. Few drivers want to slow down long enough to take their car to a professional body shop or spend top-dollar to fix minor paint chips or scratches; they would rather be out enjoying their vehicle.
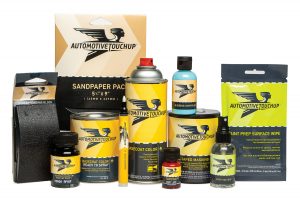
 Few aspects of car repair are simple, quick or convenient. Fixing the vehicle’s paint, however, can be all three with the use of AutomotiveTouchup paint. From paint pens and bottles to aerosol spray cans and ready-to-spray products in pints, quarts and gallons, AutomotiveTouchup is the go-to source for any type of paint repair. The best part? With a database of more than 60,000 OEM colors, including colors going back to the 60s, the company produces each paint product individually in their New Orleans-based facility. This process guarantees that each color is specially formulated for each customer, rather than an off-the-shelf, pre-mixed standard color.
AutomotiveTouchup’s easy to navigate website explains how to locate the paint code as well as how to order the paint. Just enter the vehicle’s year, make and model and every paint code for that specific vehicle will appear on a list. Find the paint code printed inside your specific car and match it to the code on the website. It’s that easy.
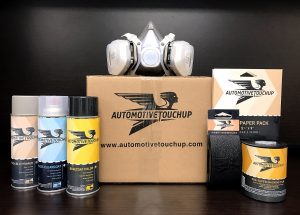
To make the process even easier, the company’s website is designed as a one-stop-shop with a range of related products and supplies specifically designed to use with the paint in order to fix any paint problem. Simply add the nitrile gloves, sandpaper, sanding block, prep solvent, rubbing compound, protective eyewear, dust masks or any other equipment needed to fix the particular paint problem to the online cart. Feel safe knowing that the color match will be precise and the repair can be performed at a fraction of the cost at the driver’s convenience. Everything arrives in one box, eliminating the need to make numerous trips to the auto parts store.
“We’ve had customers tell us that professional body shops wanted to charge them anywhere from $500 or more for basic paint repairs, but then they found our products and spent less than $100. At AutomotiveTouchup, our goal is to provide paint that blends seamlessly into the original paint while removing the hassle by making it convenient to do it yourself,” said AutomotiveTouchup General Manager Paul Fernandez. “We’re dedicated to making the process easy, so we have instructional videos on our website, and we make ourselves available to our customers should they have any questions.”
The company recommends using the products in a well-ventilated area within the temperature range of 70 to 80 degrees Fahrenheit. Test the paint color on the enclosed test card prior to applying to the vehicle. Use prep solvent to remove wax or debris from the repair area and let it dry before applying the sandable primer to the vehicle. Some repairs will need to have the primer sanded down and reapplied, but most small fixes do not require any sanding. Once the primer has dried, the paint color can be applied. Customers should make sure each layer is dry before adding another layer. Once the paint is dry, use glossy clear coat to achieve a good match and protect the base coat.
Paint bottles and pens are best suited for the small nicks and chips, and the project can be completed in just a few hours. Aerosol spray cans work best on scratches or medium size projects such as mirrors or bumpers. The ready-to-spray applications can repair larger areas such as full body panels and are also great for complete restorations. Spray guns are required for ready-to-spray applications and can be purchased directly through the website.
AutomotiveTouchup paint has also been successfully used to paint engine covers, matching brake calipers, model cars, bicycles and many other applications.
Take the time in advance to fix any paint issues so your off road vehicle looks good on its next adventure.
For more information call 1.888.710.5192 or visit www.automotivetouchup.com/ or www.microfinish.com. Follow on Facebook: facebook.com/automotivetouchup Twitter: @atu_microfinish or Instagram: @automotivetouchup.
AutomotiveTouchup’s Money-Saving, Professional-Looking
Car and Truck Touch Up Tips
As part of the frugal living trend that has grown out of a weak economy, keeping your car or truck longer or buying a used vehicle are two trends that make good financial sense and look like they’re here to stay. Learning how to fix those rock chips, scratches and nicks is a one good way to maintain your vehicle’s value and appearance, and keep small damage from growing into a bigger problem.
These types of small cosmetic repairs don’t have to require a costly trip to the body shop. By using the right tools and techniques you can get rid of nicks and scratches in your own garage. The first and most important step for any vehicle repair project, from a nick to a bumper restoration, is to get a perfect color match for your vehicle so that the repair is invisible. Unlike other handyman projects, when you’re done with this one, you don’t want people to be able to see it!
Helping do it yourselfers save money and get professional-looking results is the focus of specialty touch up paint manufacturer AutomotiveTouchup. The company custom-formulates exact-match touch up paints for thousands of cars and trucks each year using a comprehensive library of OEM colors. AutomotiveTouchup is only available online because this e-commerce approach allows them to provide the highest quality products at the lowest cost, in just the right amount needed for each customer’s project.
Cracking the Color Code
The key to the perfect color match is contained in the vehicle’s color code. The trick is finding it, since it can be located in a number of places, the inside of the door being the most common. AutomotiveTouchup’s website was carefully designed to clearly display how to find the color code, and they will verify a color code before shipping. If the paint code is wrong on an order, they will email extra help to the customer to find it, along with paint code examples for the vehicle.
The alternative, ordering by color name, is a challenge since the possibilities for color names are endless! Many times car manufacturers have a color with an individual color code, but have several names for it. For instance Toyota and Lexus share colors and color codes, but have different names for them. Oddly enough, GM brands, Honda and Acura, Ford and its family of cars also share colors. Sometimes Isuzu shares codes with Honda, Nissan with Ford, Ford with Mazda, and so on. Working with the color name, year, make, and model information, the company can provide examples of paint codes to look for.
What Products for What Project?
AutomotiveTouchup formulates touch up products to work together as part of a complete automotive paint system, and only guarantees the performance of a precisely-blended basecoat when used with an AutomotiveTouchup clearcoat.
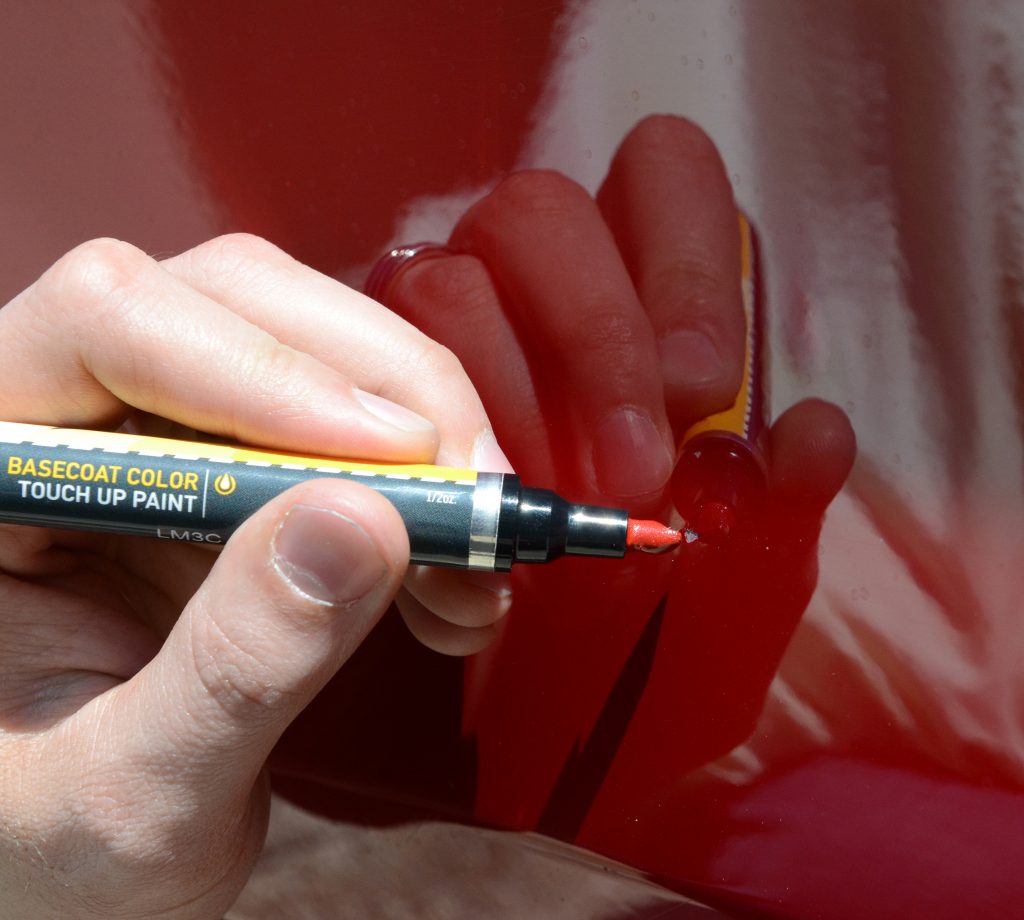
Pens – Best for small rock chips and nicks smaller than a pencil eraser, and also for thin scratches.
Bottles – Use for small areas no larger than a dime. A half-ounce bottle is sufficient for most uses, and a two-ounce bottle is also available. Bottles are packaged for long shelf life when stored correctly.
Aerosol – For larger areas, a single 12-ounce aerosol can will cover about a six square foot area. The pro-grade spray tip on the AutomotiveTouchup can creates a finely-atomized spray fan application. For larger restoration projects that require a spray gun, use ready to spray products in pints, quarts and gallons.
Test Color First
It’s important that before you do any type of repair that you test the color match of the touch up paint and compare it to the vehicle’s existing paint. AutomotiveTouchup encloses a test card with each order to preview the color before applying, and also provides a how-to video on their website with techniques to take full advantage of this color preview tool.
Best Conditions for Painting
For aerosol, the ideal temperature for spraying is 70 to 80 degrees F. Ideal humidity should be 50% or less.
Surface Preparation
Thoroughly clean the area to be repaired with dish soap (Joy, Dawn etc.) and water before painting to remove wax, silicone and oils. Regular car soap often has a car wax so this product should not be used. Then dry completely. Use prep solvent and a clean lint free towel to assure the surface is free of wax, silicone, and oils.
Basic Sanding
This is usually required for an aerosol spray project. The directions for paint pens and bottles involve fewer steps, less sanding and no masking off. If needed, sand out rust, scratches, or bad surface damage with 180-320 grit sandpaper. Primer will cover over 180-320 grit sand scratches. Use 600 grit wet sandpaper to sand the area where you will use basecoat. Wet sand the blend panel (area that might get some basecoat and will get clearcoated) with 1000-1500 grit wet sandpaper. Entire area to be painted should be dull and smooth.
For new plastic parts, lightly scuff the area with a fine scuff pad. For new metal parts you may lightly use a medium scuff pad for topcoating with solid colors, use a fine scuff pad for metallic and pearls.
Masking Off Adjacent Panels
Mask off adjacent panels to prevent overspray, being careful to not try and tape off a small square and limit the primer or paint to a tiny square area. Working on a small area means that as soon as you remove the tape you can see the lines, and that’s a hard thing to recover from. The goal is to limit the tape lines to masking off adjacent panels. If you have to tape something off mid-panel, try not to spray the paint directly against the tape edge. If you notice a break in the body line you might be able to get away with “backtaping” to soften the tape-line effect. See the how-to video “Masking Techniques” at AutomotiveTouchup.com.
Use 3M automotive grade 3/4″ masking tape and masking paper or pretaped film. Never tape off mid-panel or you will see a tape line. Make a line with tape first, then tape paper to your existing tape line. Doubling up newspaper will work, but paint has a possibility of bleeding through with excessive heavy coats. Use 1 ½-inch or 2-inch masking tape for small areas like tail lights and reflectors. If you are painting in an enclosed area, mask the entire car with plastic sheeting to prevent overspray.
Prime (if required)
For plastic and fiberglass parts, before priming, use plastic parts adhesion promoter over bare plastic or fiberglass. (Note: this is only required for aerosol paints, not pens or bottles). Spray two light coats over lightly scuffed surface.
Shake primer well. Apply aerosol primer over clean sanded metal or plastic treated with plastic parts adhesion promoter. Many primer colors are available for better paint coverage. Primer will fill 180-320 grit wet sandpaper scratches. Apply three or more coats, allowing five to ten minutes of dry time in between coats. Sand the primer in 30 minutes with 600 grit wet sandpaper. Use regular water to clean off sanding dust, then dry the area and replace the dust-contaminated masking tape and paper. Do not use prep solvent over the fresh primer. Use a tack rag to pick up lint and dust particles.
Apply Paint
Thoroughly shake the basecoat color pen, bottle or spray can before applying. Spray a test panel with basecoat and clearcoat first to compare color match and coverage. Apply as many medium coats necessary to cover the area, waiting five to ten minutes minimum between light coats. Each coat should appear uniform and dry between each coat. You may gently use a tack cloth between each dry coat of basecoat. Spray light dust coats if a metallic or pearl color looks too dark. Wait 30 minutes before using clear- coat.
It’s important to use a blending technique when doing an automotive paint repair so it looks less obvious compared to a paint repair done incorrectly by masking off a small section. Blending is the art of making a line disappear, and AutomotiveTouchup provides a how-to video to help you learn tricks and techniques to blend new automotive paint with your existing paint. The final step, the clearcoat, covers the entire surface so everything is more uniform.
Tri-Coat Car Paint Repair Directions – A car manufacturer will paint a vehicle one color (a groundcoat), then they will paint over it with a very transparent color with a higher density pearl. This method gives a different effect. Sometimes there is a two-stage formula available which is easier to apply, but usually any color that has the word “Tri-coat” in the color description will need three different steps to achieve the correct color. First the basecoat is applied, followed by the midcoat and finally a clearcoat is applied. Make sure you practice before applying this touch-up paint to your vehicle.
Apply Clearcoat
Shake aerosol clearcoat well. Allow 30 minutes after basecoat color has been applied to apply the clearcoat. Apply two to four wet coats waiting 5-10 minutes in between coats for aerosol and 10 to 20 minutes for bottles and pens. With these brush-on products, be gentle with the brush so the undercoats are not disturbed. For aerosol, each coat should look wet and glossy but not dripping. Clearcoat should be dry to the touch in one to two hours but will completely dry overnight. Wait one day to use rubbing compound for an optimum gloss level. For aerosol, you can sand out orange peel, light texture, or dust imbedded in the clearcoat film with 1500 wet sandpaper, and then use rubbing compound to bring out the gloss.
Helpful Tips
- Practice using touch up paint before applying, to get a feel for the paint and to check the color match. Use a glossy sheet of paper or metal can as a practice surface.
- Apply in an area with adequate ventilation.
- Use several light coats rather than one heavy coat.
- Allow the correct amount of drying time. Drying times can vary depending on the temperature. If the temperature is below 70°F, the paint can take longer to dry.
- Store touch up products in a cool, dry location, not in a vehicle.
- Do not spray primer, paint or clearcoat in direct sunlight.
- Post touchup, fresh paint is a little soft and its best not to do any hard scrubbing. The solvents in the wax can attack the clearcoat if it hasn’t had time to cure.
- Do not wax for 30 days.
- Touch-up products including primer and clearcoats are hazardous. Keep away from children and wear safety glasses and a respirator mask.

