Tech
REAL SWINGER Fabworks rear bumper with swing-out tire
Originally Published in Issue 36 of 4Low Magazine
Make sure to subscribe to get the newest issues of 4Low Magazine right to your mailbox. CLICK HERE
By Christian Sturtz, [email protected]
Photos by Christian Sturtz
Oversized tires and heavy wheels can wreak havoc on stock tire carriers. The additional weight can break the carrier itself or ruin the tailgate. Thankfully, KD Fabworks makes full replacement heavy-duty rear bumpers with swing-out tire mounts for Jeep TJ/LJ applications. Standard features on the bumper include D-ring mounts, a 2” receiver, a tapered roller bearing pivot, frame tie-in brackets, a grade 8 hardware kit with optional high lift mount, and a third brake light license plate holder. 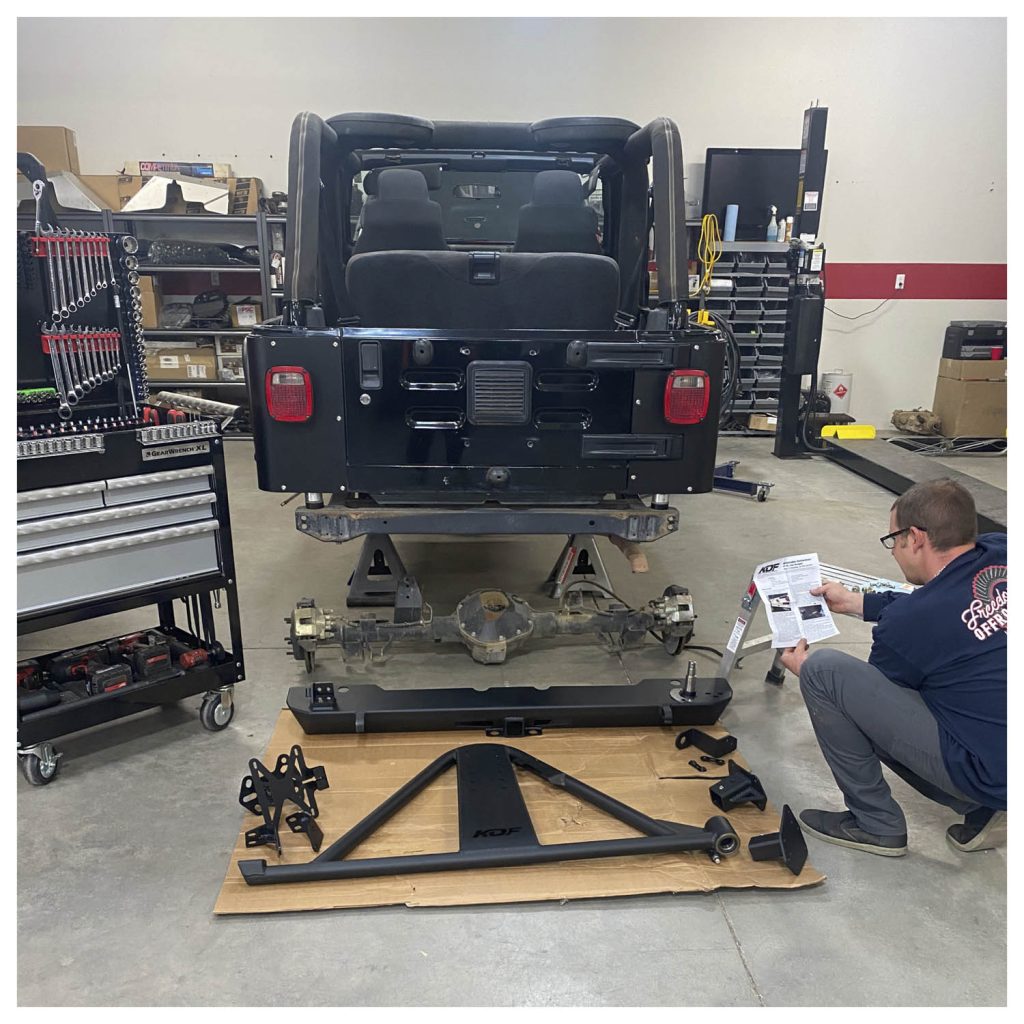
In a normal install, you would start by removing the original rear bumper and tire carrier. Removal is pretty straight forward- the bumper has two nuts on each side and two bolts that come up from the bottom. Four bolts hold on the tire carrier, but you have to remove the third brake light housing to get to some of them. You also have to cut and cap off, or wrap-up, the third brake light wires. This Jeep had no bumper, so none of this was necessary for our application.
To start our install, we removed the rear cab mount bolts completely and loosened the other four cab mount bolts on both sides. The rear corner was jacked up, and cab mounts were removed. We slid the new bumper into place, the cab mount was replaced through the bumper into the frame, and we lowered the cab. Finally, we marked the six additional mounting holes for the new bumper. We tried to cut down a pencil and mark the inboard outer bolt holes. No luck! Hands wouldn’t fit. We ended up having to measure these out. 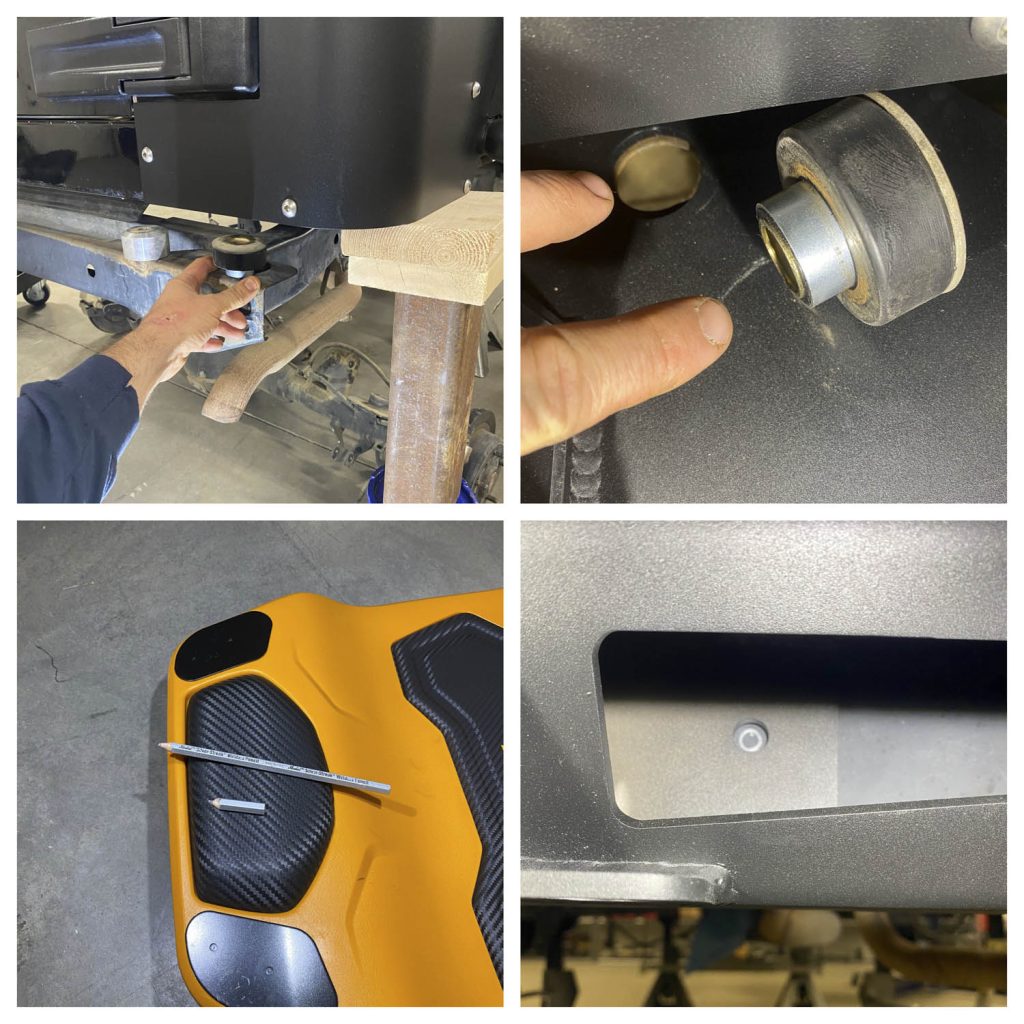
The cab was jacked back up and cab mounts were removed along with the bumper. The marked holes were center punched and drilled to ½”, the 7/16” bolts were slid up through the outside inboard holes, and keepers were pushed on with an extension and socket. We reinstalled the bumper and cab mount, then all of the bumper mount hardware and frame tie-in brackets were installed loosely. The bolt holes closest to the receiver are ½” and the rest are 7/16” you reuse the two bolts that come up from the bottom on your original bumper. The frame tie-ins come with captive nut plates, which must be slid up into a frame hole for the bolts to be started. 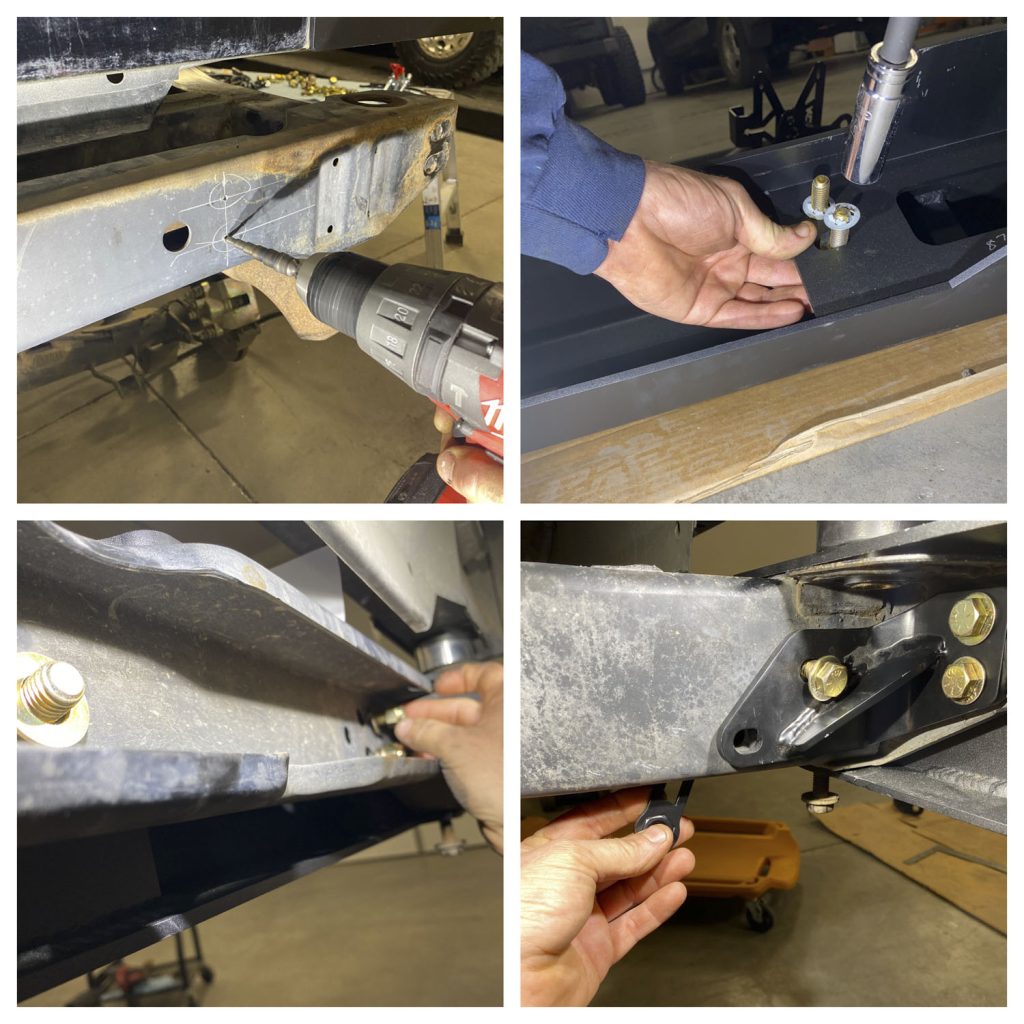
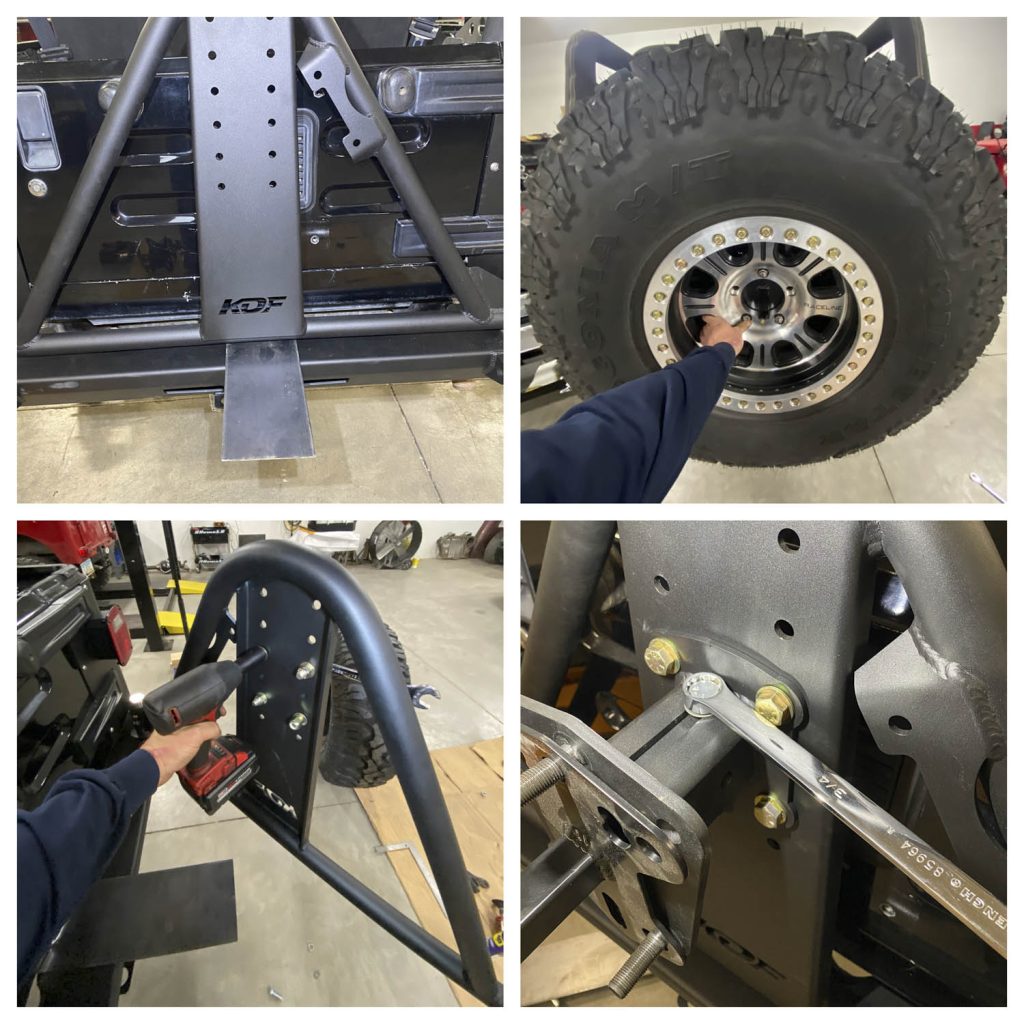
All of the bumper hardware and cab mounts were then tightened from the inside to the outside. The swing out was placed on the spindle, and the washer/spacer was also placed lip down on the spindle. We put some grease on the lips of the seals prior to installation on the spindle. Next, the double shear mount was installed on the spindle, and the mounting hardware was installed loosely. Finally, the spindle nut and double shear mount were tightened. We used a glove to protect the aluminum nut cover. (*Tip- we tried tightening the double shear mounting hardware first and couldn’t get the spindle nut tight enough to take the play out of the bearing. So be sure to tighten the spindle nut before the bracket.)
The latch was then bolted into place and adjusted. Next, the wheel studs were pulled into the tire plate. We used washers, turned the nuts over, and pulled them in with an impact. We next sandwiched the license plate mounting bracket between the tire plate and wheel. The lug nuts were tightened. 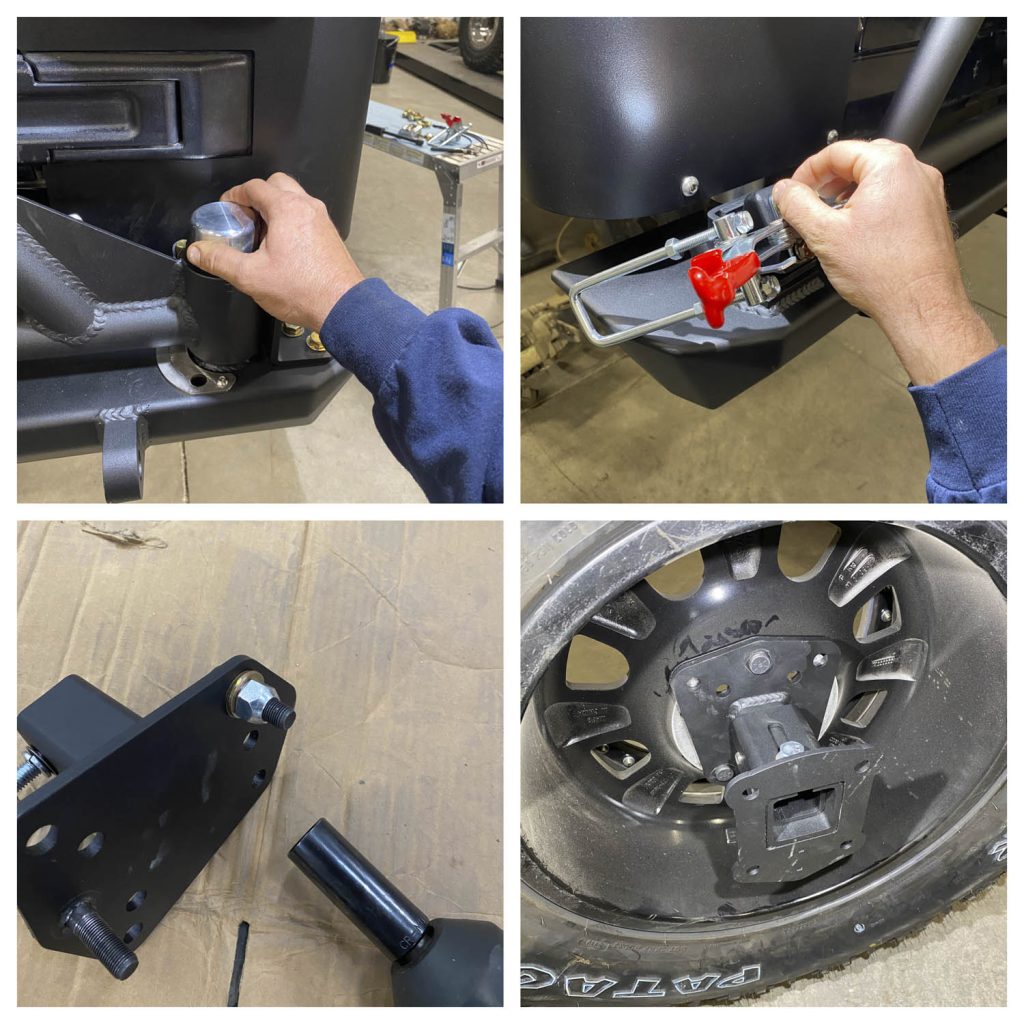 We wanted to keep the tire as low as possible and still be able to use the receiver. So, to figure out the tire plate mounting location we clamped a piece of strap on the top face of the bumper and sat the tire on that. The tire mounting plate depth was also marked, so the tire is touching the tubes of the swing out. Finally, the tire plate was removed from the wheel and bolted into its desired place. The tire plate’s depth was then adjusted, and the set bolt and screw were tightened. You want to move the tire plate in about ¼” from your mark, this will help with rattles.
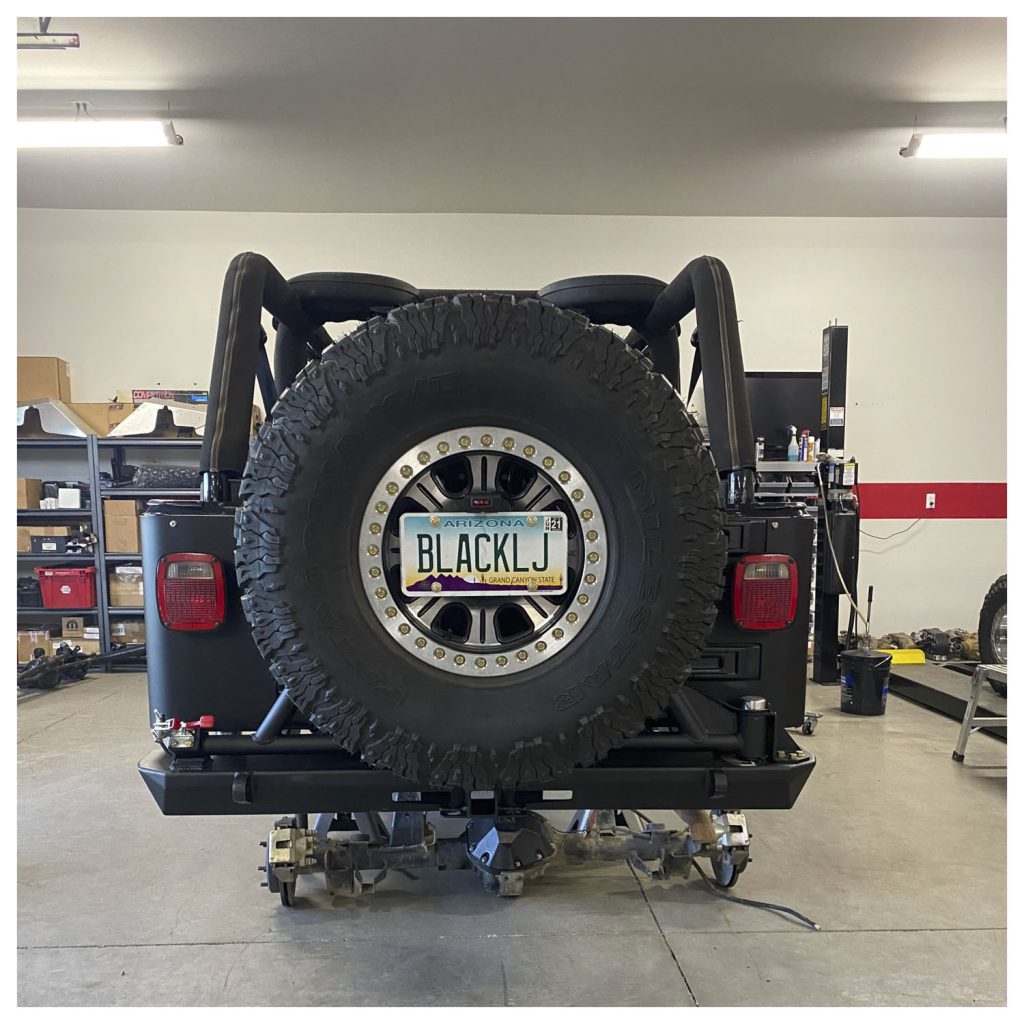
To finish the whole install, we added the two LED lights to the license plate holder. The tire was bolted onto the tire plate. The license plate holder was slid into the mount, adjusted to desired depth, and tightened. Finally, the harness for the lights was ran down the tube of the swing out and wired into the right rear tail light. Be sure to grease the grease exerts on the swing out and check them occasionally. Finally, the lights were checked for function. 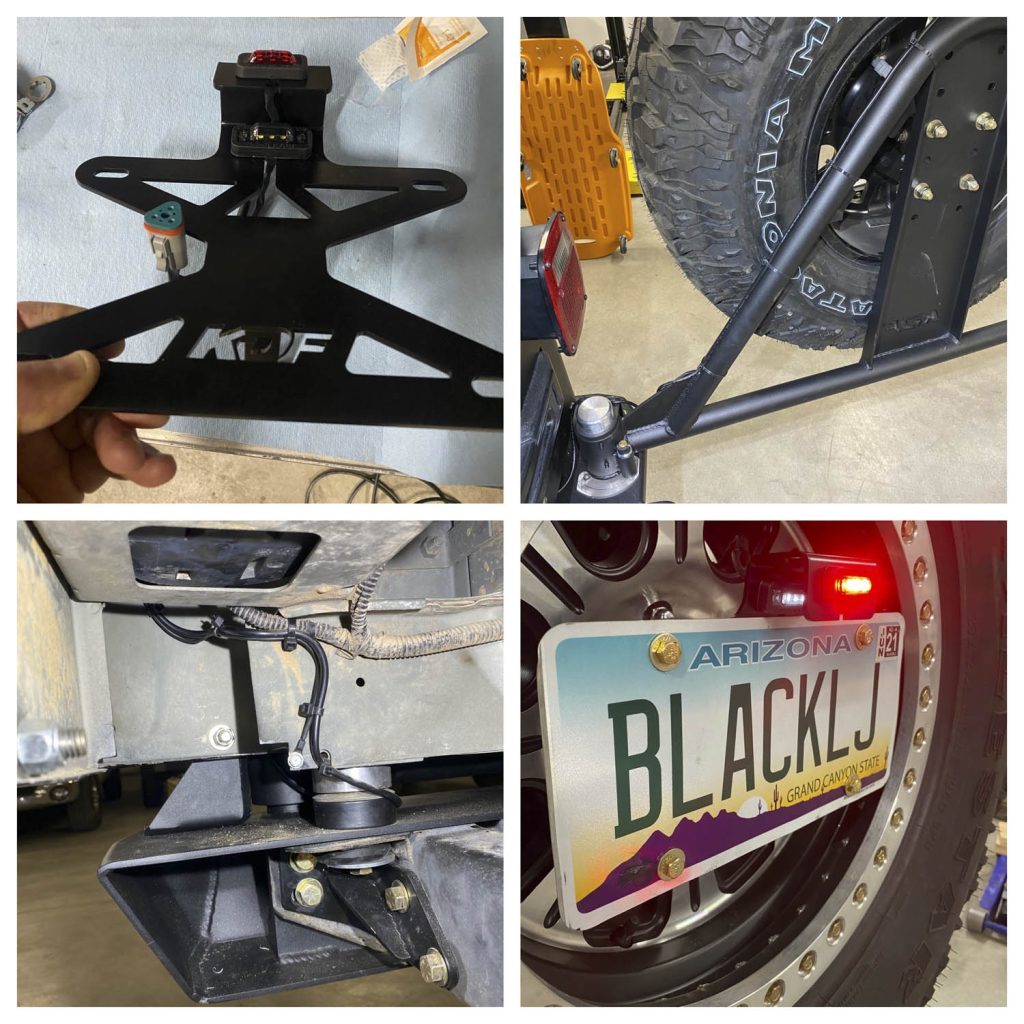 Now we have a rugged “swinger” that can handle abuse from a hard day on the trails, and it looks great too!
Parts Used:
KD Fabworks:
Tire Carrier (TJ-R9706-TC-PC555DL)
License Plate Mount (BRK-1009)
Sources:
KD Fabworks
20410 NE 161 St.
Brush Prairie, WA 98606
888-535-1580
www.KDFabworks.com
