Tech
Building Ford 8.8 Axle
Originally Published in Issue 36 of 4Low Magazine
Make sure to subscribe to get the newest issues of 4Low Magazine right to your mailbox. CLICK HERE
8 POINT GREAT
By Christian Sturtz, [email protected]
Photos by Christian Sturtz
An excellent option for an upgraded rear axle in a Jeep XJ, YJ, or TJ/LJ model is a Ford 8.8. Ford 8.8s are found in 1995-2001 Ford Explorers and Mercury Mountaineers. Other Explorer variations through 2005 sported them as well. However, you will want to do your research and make sure you know what you are buying. 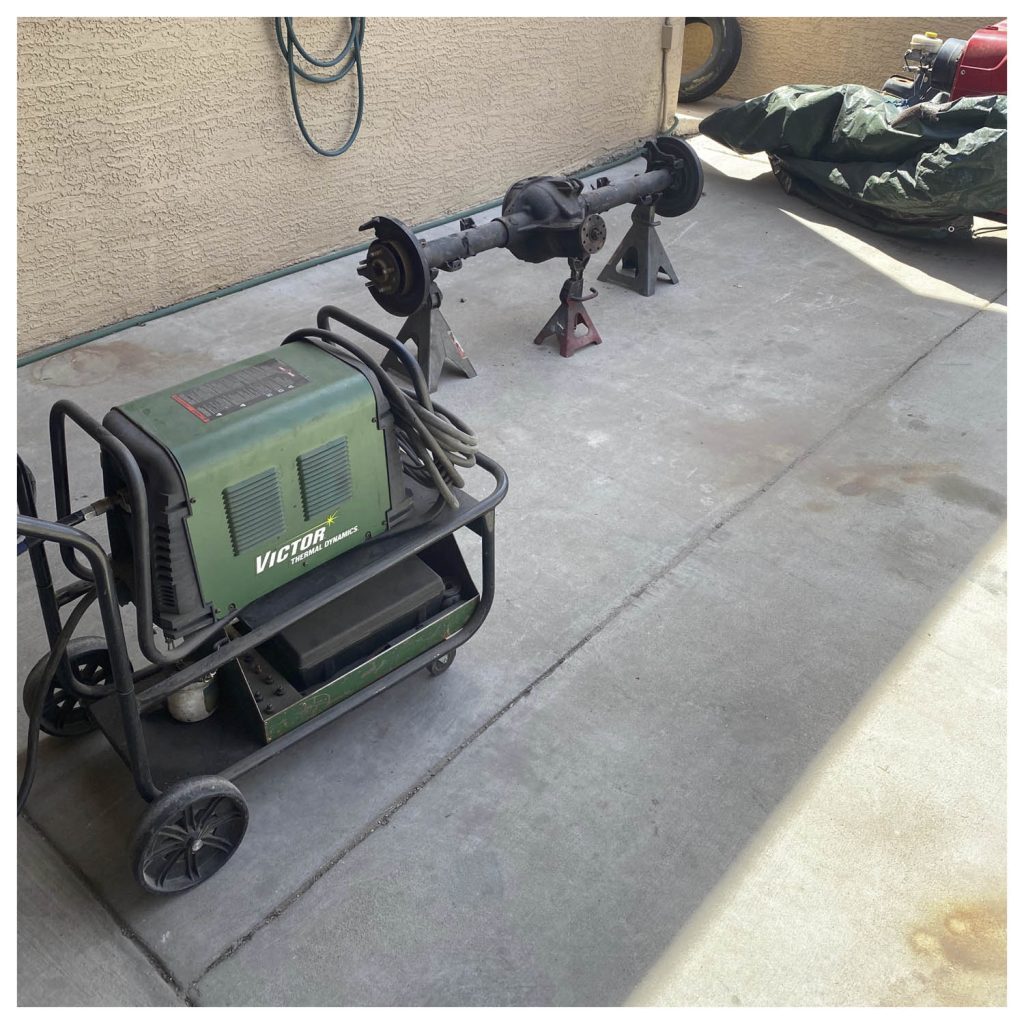
Why is an 8.8 a great axle to swap into a Jeep? For starters, they have larger ring gears than are available in the XJ, YJ, TJ/LJ models. The axle shafts and wheel bearings are also bigger. They have large 3.25” axle tubes that are .250” or .188” wall. They come factory with disc brakes, internal emergency brakes, and their width is close to Jeep width. They are available with factory limited slips and 4.10 gears; though other gear ratio options are available. Bonus, there is huge aftermarket support!
We will overview the installation of Barnes 4WD truss/bracket kit on an 8.8 going into a TJ/LJ application in this article. Buy your 8.8 from a reputable wrecking yard that has a warranty when you can. We started by placing the axles on jack stands and removing items that eventually will be replaced or are unneeded, such as brake rotors, emergency brake cables, differential vent, and the harmonic weight. Next, we plugged the differential vent hole, cut off the brackets and brake line tabs, and ground the housing smooth. Finally, the housing was wire brushed and cleaned. 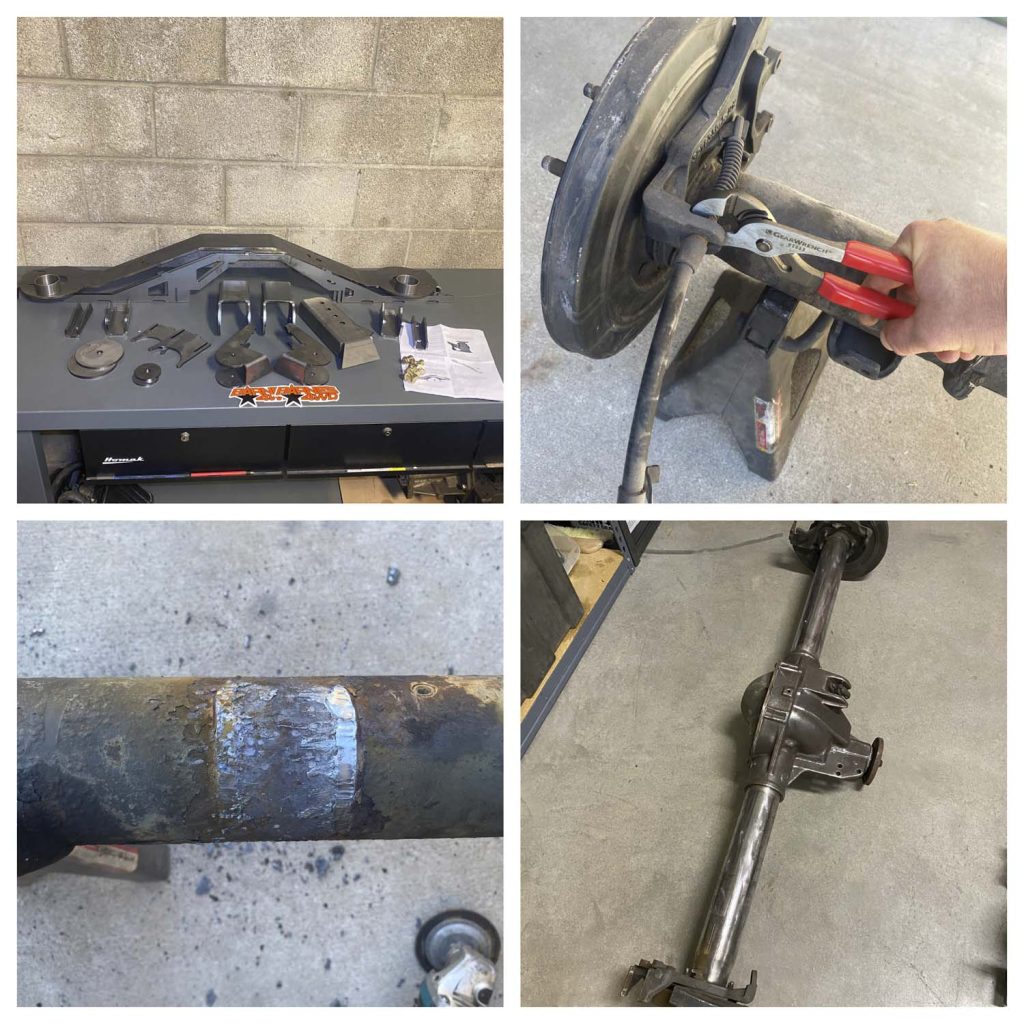
Before any of the Barnes parts were placed into position, we pulled the axle shafts and checked to make sure the axle was straight. It looked great! Next, the five pieces that make up the main truss sections were keyed together and clamped, so there were no gaps. It may be necessary to bow the top (thick piece) to get all of the keys to go into their slots. The assembled and clamped section was tacked together and, clamps were removed. It is a good idea to read through the directions and check where other parts key in so you don’t have to grind out your tacks. Finally, the axle was leveled on stands, and the desired pinion angle was set. You can base your pinion angle on the axle that was originally in your Jeep. Ours ended up being 12-13 degrees, but generally, they range from 10-20 degrees. 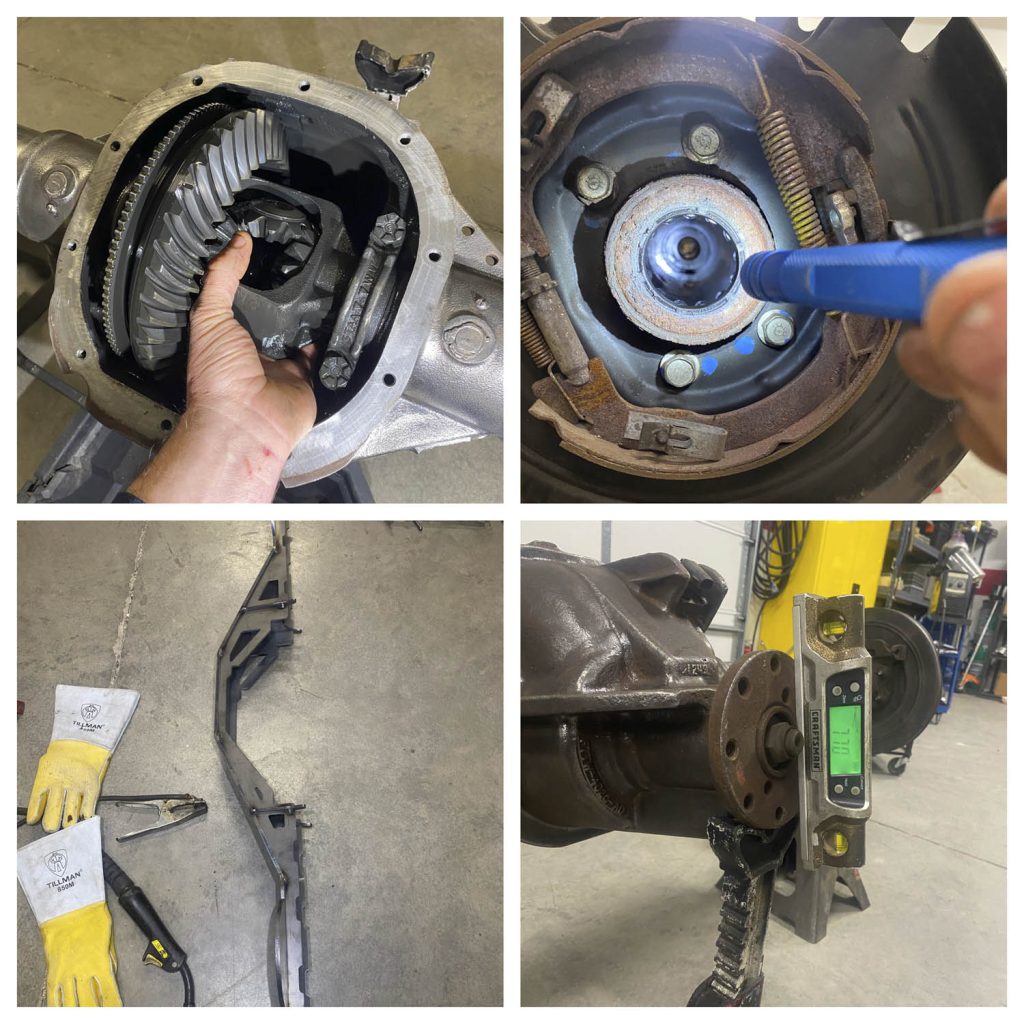
The truss was then sat on the housing, centered between the brake backing plates, and leveled. Using a marker to mark the location. We used a line-up punch to mark the new vent hose location and lifted off the truss. The new location was drilled, tapped, and pipe barb was installed with thread sealant. Finally, the truss was placed back into position, clamped down (free of gaps), and tacked. Pay attention to your tacking location; there are still a lot of brackets that have to mounted. 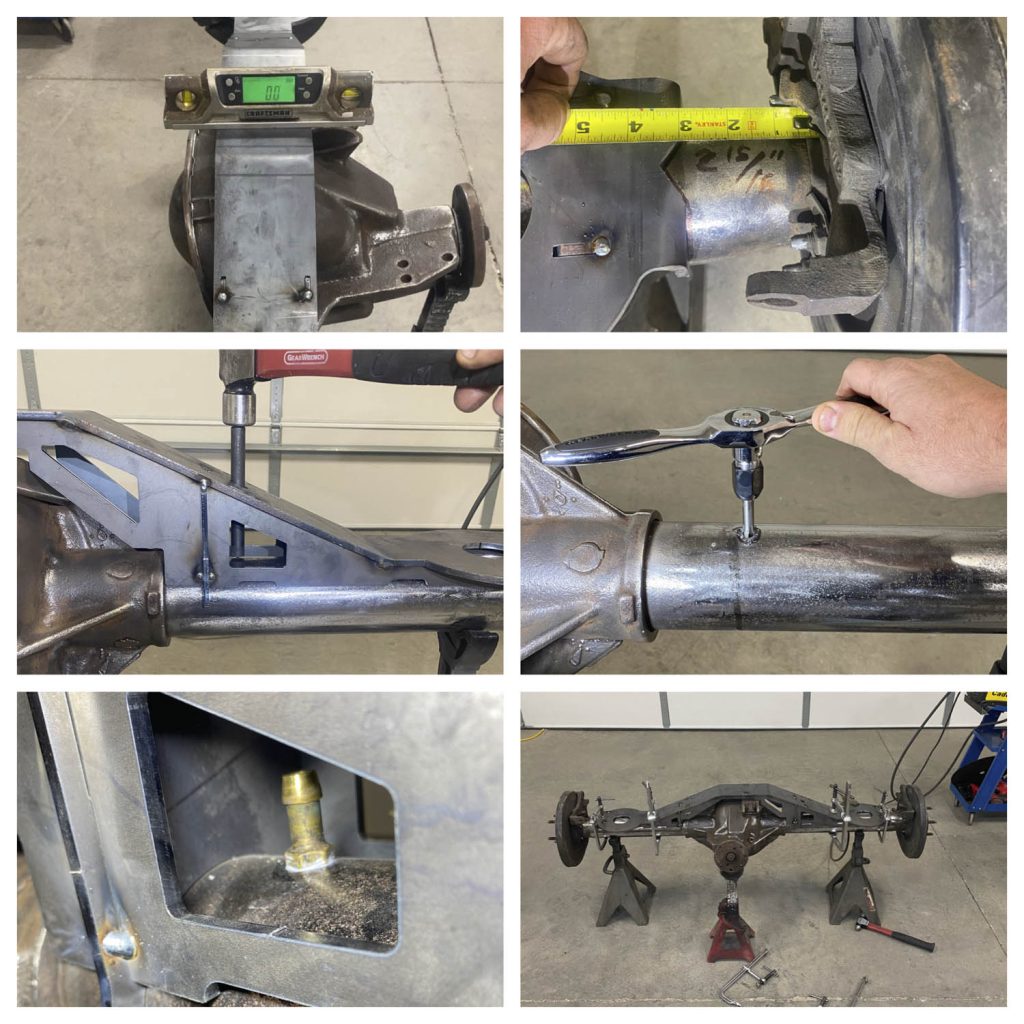
You’ll need to weld nuts on the inside of the sway bar mount and the inside of the coil spring retainer, before any of the brackets can be attached. The top to the coil retainer must also be welded from the inside, flush with the steel sleeve. The coil spring retainers were then slipped into position, squared up, and tacked into place. The upper control arm mounts were slid down the truss, into position, and tacked. If they are positioned correctly, the radius on the bottom of the bracket should be touching the axle tube. The notches for the top plate of the truss and the notch for the front face of the truss should also be keyed in. Next, the track bar mount was keyed into position and rotated, so the bottom part of the bracket was touching the axle tube, and tacked. Then the sway bar mounts were positioned, squared up with the axle tube, and tacked. If these are positioned correctly they should be touching the inside top edge of the upper control arm mounts towards the pinion. Finally, the lower control arm mounts were lined up, rotated against the front outside bottom edge of the truss, and then tacked into position. Make sure they are completely seated on the axle tube. 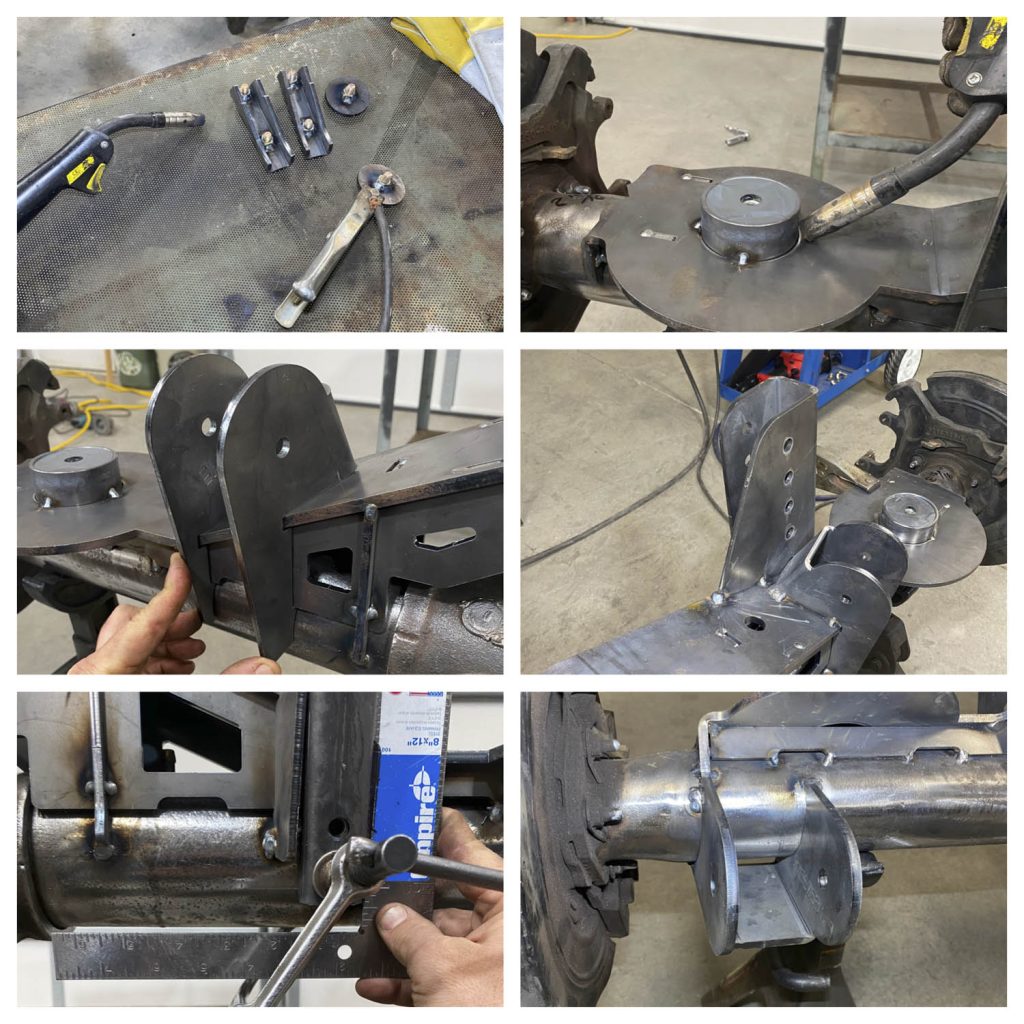
The directions want you to bolt the axle into position, cycle the suspension, and check for any interference problems before fully welding. For best performance, we locate and tack the shock mounts at this time. The Barnes truss kit is well thought out and fits great. Now we are one step closer to having an “8 Point Great” differential. Next time we will check the fit, and if it’s ok we’ll tack the shock mounts into position, remove the housing, and fully weld. We may even have a few more parts to throw at this LJ to make it even greater. 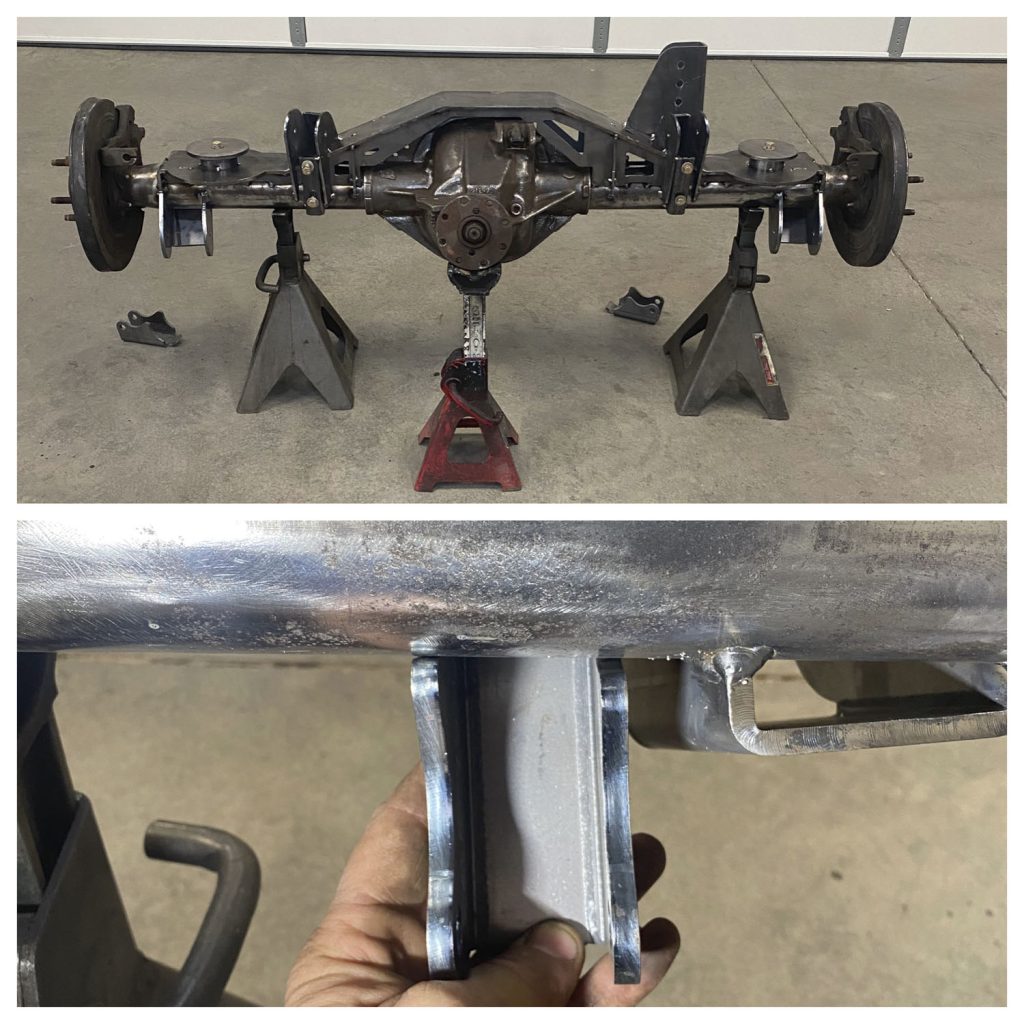
Parts Used:
Barnes 4WD:
Truss Kit (B4WK1152)
Sources:
Barnes 4WD
4 Brandy Branch Rd.
Miller River, NC 28759
828-551-7616
www.barnes4wd.com
GEARWRENCH
APEX Tool Group
910 Ridgebrook Rd. (Suite 200)
Sparks, MD 21152
1-800-688-8949
Esab Welding and Cutting Products
2800 Airport Rd.
Denton, TX 76207
800- ESAB- 123
Thermal Dynamics
82 Benning St.
West Lebanon, NH 03784
866-279-2628
www.esabna.com
